
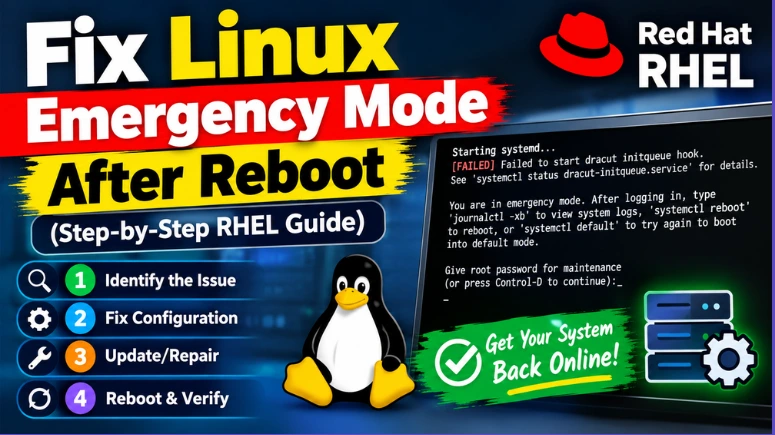
A RHEL server entering Emergency Mode after a reboot is stressful, especially when the reboot happened immediately after OS patching or a kernel update. In many cases, however, the operating system itself is healthy—the boot process is stopping because systemd cannot mount a filesystem, activate an LVM volume, or satisfy an entry defined in /etc/fstab.
The good news is that this type of failure can often be recovered directly from the emergency shell without reinstalling the OS.
Fix Linux Emergency Mode After Reboot
If the server is stuck at an emergency prompt, the immediate recovery sequence is usually:
Remount the root filesystem as read-write:
mount -o remount,rw /Check whether the expected LVM volumes are available:
lvsReview
/etc/fstaband temporarily comment out missing/non-critical mount entries:cat /etc/fstab vi /etc/fstabSave the file and reboot:
systemctl reboot
This exact recovery workflow matches the supplied production incident notes: after patching, the server entered an error state, the root filesystem was remounted read-write, LVM was checked with lvs, and problematic /etc/fstab entries were commented out before rebooting successfully.
Why RHEL Enters Emergency Mode After a Reboot
Emergency Mode is not necessarily an indication that the RHEL installation is corrupted. It means the boot process encountered a condition serious enough that systemd could not continue normally.
A common production sequence looks like this:
OS patching → reboot → systemd starts → filesystem/mount dependency fails → boot waits for device → timeout → emergency mode
This is particularly common when the server has additional disks, LVM storage, application filesystems, SAN volumes, or manually maintained /etc/fstab entries.
Common causes
Some of the most frequent causes include:
- A logical volume is no longer available.
- A volume group is not activated.
- A SAN or multipath disk is unavailable.
- A secondary filesystem was removed but remains in
/etc/fstab. - A disk UUID changed or no longer exists.
- A custom application mount is unavailable.
- A swap device referenced in
/etc/fstabis missing. - An OS/kernel update changes boot timing or device discovery.
systemdwaits for a device or mount until its timeout expires.
For example, if /etc/fstab contains an entry for /app, but the corresponding LVM volume is unavailable, systemd can wait for that mount during boot.
The important distinction is that the root filesystem may be perfectly healthy while a secondary mount prevents normal boot.
Step 1: Gain Write Access — remount root rw emergency mode
When RHEL drops into emergency mode, the root filesystem may be mounted read-only. This protects the filesystem while the system is in a recovery state, but it also prevents you from modifying /etc/fstab.
First try:
mount -o rw /You may receive an error similar to:
mount: / already mounted or mount point busyThis happens because / is already mounted. The problem isn’t that the filesystem needs to be mounted again; it needs to have its existing mount state changed.
Use:
mount -o remount,rw /The remount option tells Linux to modify the options of the existing root mount rather than attempting to mount / a second time.
Verify the result:
mount | grep ' on / 'You should see the root filesystem mounted with rw.
At this point, /etc/fstab should be editable.
Step 2: Diagnose Missing LVM Volumes
The next step is to determine whether the boot failure is related to LVM.
Run:
lvsThis displays the logical volumes currently visible to the system.
For additional information, use:
vgs
pvs
A typical healthy LVM layout might contain:
VG       LV       Attr       LSize
rhel     root     -wi-ao----  50.00g
rhel     swap     -wi-ao----   8.00g
rhel     var      -wi-ao----  20.00g
Now compare those logical volumes with /etc/fstab.
Run:
cat /etc/fstabLook for entries referring to:
/dev/mapper/.../dev/<vg>/<lv>- UUIDs
/app/data/backup- custom application filesystems
- secondary swap devices
For example:
/dev/mapper/rhel-root   /       xfs   defaults   0 0
/dev/mapper/rhel-var    /var    xfs   defaults   0 0
/dev/mapper/appvg-app   /app    xfs   defaults   0 0
If appvg/app does not appear in the output of lvs, but /etc/fstab expects it, you have a strong indication of an fstab mount failure.
Check whether the volume group exists
Run:
vgsIf the expected VG is absent, check physical volumes:
pvsIf the disk containing the PV is missing, the problem may be storage-related rather than an /etc/fstab problem.
Do not immediately remove the /etc/fstab entry if the missing disk contains important production data. First determine why the storage is unavailable.
Step 3: Check journalctl boot logs
The boot journal normally provides the fastest way to identify exactly what stopped the boot process.
Run:
journalctl -xbThis shows the journal for the current boot.
For a shorter list containing primarily errors:
journalctl -xb -p 3Look for messages containing:
Failed to mount
Dependency failed
Timed out waiting for device
Job failed
Cannot find device
Mount process exited
Reached target Emergency Mode
For example, you might find something similar to:
A start job is running for /app
Timed out waiting for device
Dependency failed for /app
That immediately points you toward the corresponding /etc/fstab entry.
Why patching can expose the problem
Before patching, a system may boot successfully because storage devices happen to become available quickly enough.
After a kernel or OS update, changes to the initramfs, storage drivers, device discovery, systemd behavior, or boot ordering can expose an existing configuration problem.
The result can look like a kernel problem even when the actual failure is simply a missing filesystem.
For production troubleshooting, don’t assume:
“The server was patched, therefore the kernel is broken.”
Instead, identify the exact failed systemd target or mount from the boot journal.
Step 4: Safely Edit /etc/fstab
Once you have confirmed that a non-critical filesystem is responsible for the boot failure, you can temporarily disable its automatic mount.
First create a backup:
cp -p /etc/fstab /etc/fstab.bakThen edit:
vi /etc/fstabPress:
ito enter insert mode.
Suppose you find:
/dev/mapper/appvg-app /app xfs defaults 0 0If /app is a non-critical application filesystem and the underlying storage is currently unavailable, comment out the entry:
#/dev/mapper/appvg-app /app xfs defaults 0 0You can also comment out an obsolete secondary swap entry if you have confirmed that it is not required for the current boot.
After making the change:
Esc
:wq
The supplied incident notes use this same procedure: edit /etc/fstab, comment the problematic lines, save with Esc :wq, and reboot; the server then returned to service.
Be careful with root and essential filesystems
Do not blindly comment out entries such as:
/
 /boot
 /boot/efi
 /var
or other filesystems known to be required by the operating system.
Before disabling an entry, understand what filesystem it represents and whether applications or system services depend on it.
Step 5: Test the Configuration Before Rebooting
If possible, validate the modified fstab before rebooting.
On systems where the required mount infrastructure is available, you can test:
mount -aIf there is an error, investigate it before rebooting.
You can also inspect:
findmntand:
lsblk -fThese commands help correlate disks, partitions, filesystem types, UUIDs, and mount points.
For LVM systems, also check:
lvs
vgs
pvs
The objective is to make sure you haven’t accidentally introduced another boot dependency.
Step 6: Exit Emergency Mode and Reboot
Once the problematic /etc/fstab entry has been corrected or temporarily disabled, reboot:
systemctl rebootIf systemctl isn’t usable in the emergency environment, you may also use:
rebootWatch the boot process carefully.
The server should proceed through the normal systemd targets rather than returning to Emergency Mode.
After SSH becomes available, verify:
uptimeThen check mounted filesystems:
df -hCheck failed systemd units:
systemctl --failedAnd review the latest boot:
journalctl -b -p 3If the output is clean and the host is accessible, the immediate boot issue has been resolved.
Permanent Fixes: Prevent Another RHEL Emergency Mode
Temporarily commenting out /etc/fstab is a recovery technique, not necessarily the final fix.
If the missing filesystem is required by an application, determine why its storage disappeared.
Use nofail for non-critical filesystems
For a filesystem that should not prevent the OS from booting, consider:
/dev/mapper/appvg-app /app xfs defaults,nofail 0 0nofail tells the boot process that failure to mount this filesystem should not make the system fail its normal boot sequence.
This is particularly useful for:
- optional application storage
- backup volumes
- removable storage
- secondary data disks
- non-essential filesystems
Do not use nofail as a substitute for fixing a filesystem that the operating system genuinely requires.
Use _netdev for network-backed storage
For network-dependent storage, _netdev can tell systemd that the mount requires network availability.
For example:
server:/export/app /app nfs defaults,_netdev 0 0This helps systemd understand the dependency relationship between networking and the mount.
Recovering a Missing LVM Volume Group
If the server is booted but an expected VG is missing, investigate the storage layer.
Start with:
pvs
vgs
lvs
Then:
lsblkLook for the physical disk or partition that should contain the LVM physical volume.
If the physical volume is visible but the VG is not active, you can attempt:
vgchange -ayThen verify:
vgs
lvs
If the server uses SAN or multipath storage, also check:
multipath -llA missing LUN, broken multipath path, storage presentation issue, or unavailable HBA can prevent the expected VG from appearing.
In a production environment, don’t repeatedly run storage-repair commands without first understanding whether the underlying disk or SAN is actually available.
A Practical Production Troubleshooting Flow
When a patched RHEL server enters Emergency Mode, use this sequence:
Emergency Mode
      |
      v
Remount root RW
      |
      v
mount -o remount,rw /
      |
      v
Check LVM
lvs / vgs / pvs
      |
      v
Check /etc/fstab
      |
      v
Review boot errors
journalctl -xb -p 3
      |
      v
Identify failed mount
      |
      +---- Storage exists?
      |          |
      |          +-- YES --> Fix/activate storage
      |          |
      |          +-- NO ---> Temporarily disable non-critical fstab entry
      |
      v
Test configuration
      |
      v
systemctl reboot
      |
      v
Verify SSH + mounts + failed units
Final Checklist
When troubleshooting Fix Linux Emergency Mode After Reboot, keep this checklist beside you:
# 1. Make root writable
mount -o remount,rw /

# 2. Check LVM
lvs
vgs
pvs

# 3. Review filesystem configuration
cat /etc/fstab

# 4. Check disks/filesystems
lsblk -f

# 5. Check current boot errors
journalctl -xb -p 3

# 6. Backup fstab
cp -p /etc/fstab /etc/fstab.bak

# 7. Edit problematic non-critical entry
vi /etc/fstab

# 8. Test mounts
mount -a

# 9. Reboot
systemctl reboot

# 10. Verify after boot
systemctl --failed
df -h
journalctl -b -p 3
The key lesson is to identify the failed dependency before changing anything. On many RHEL emergency-mode incidents, the operating system is not actually broken; systemd is simply refusing to complete boot because it cannot satisfy a filesystem or storage dependency.
If the issue appeared immediately after patching, compare the failed mount, LVM state, boot journal, and /etc/fstab before considering kernel rollback or more invasive recovery. That approach gets you back online quickly while preserving a clear path to the underlying permanent storage/configuration fix.
Suggested Read:
- How to clear var space in Linux – Best Practices for Freeing Up Disk Space
- How to Install Spaceview Disk Space Analyzer (Disk Utility) in Ubuntu – A Best Disk Usage Indicator for Linux
- Best Useful Linux DF Command With Examples
- Useful Linux Fdisk Command With Examples – A Linux Disk Partition Tool
- How to Extend Root Partition in Linux: Step-by-Step Guide for Safe Disk Expansion
- How to Clear RAM Cache in Linux: Step-by-Step Guide for Better Performance