
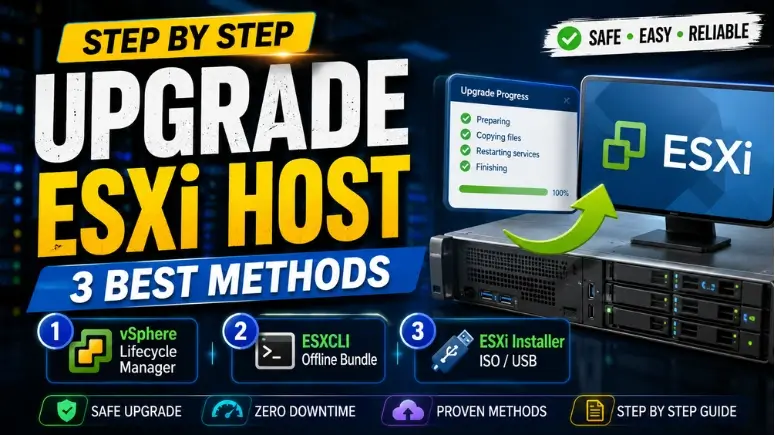
Upgrading an ESXi host is not simply a matter of installing a newer ESXi image and rebooting the server. Before starting the upgrade ESXi host process, administrators need to confirm the supported upgrade path, hardware compatibility, vCenter compatibility, image or profile compatibility, configuration backup, storage health and the appropriate upgrade method.
However, some terminology and workflows in that document are version-specific. In particular, baseline-based lifecycle management is now a legacy approach in newer vSphere releases, while vSphere Lifecycle Manager Images is the preferred lifecycle-management model. Broadcom says baseline functionality was deprecated with vSphere 8 and major baseline functionality has been removed in vSphere 9.
If you want to upgrade ESXi host safely, the basic workflow is:
- Identify the current ESXi build and target version.
- Verify the supported upgrade path.
- Check vCenter and ESXi interoperability.
- Confirm server hardware, firmware and drivers are supported.
- Back up the ESXi host configuration.
- Migrate or shut down workloads as required.
- Put the host into maintenance mode.
- Select the appropriate upgrade method.
- Perform the upgrade.
- Reboot and verify the ESXi build, storage, networking and workloads.
Do not start the upgrade until the compatibility and recovery requirements have been checked.
ESXi Host Upgrade Requirements
Before you upgrade ESXi host, first establish exactly what is running today and what version you intend to install.
1. Check the current ESXi version
Record the current ESXi version, update level and build number. This information is important because supported upgrade paths are version/build dependent.
Do not assume that every older ESXi release can be upgraded directly to every newer release. Broadcom specifically documents supported upgrade paths through the Product Interoperability Matrix.
For example, Broadcom notes that ESXi 6.5 upgrades to ESXi 8.0 are not supported, while particular ESXi 6.7 releases have supported paths depending on the release/build.
2. Verify the upgrade path
Use the Product Interoperability Matrix and select the Upgrade Path option. It allows administrators to check the supported path between product versions and patch releases.
This step is especially important when jumping between major ESXi releases.
3. Check vCenter compatibility
If the host is managed by vCenter Server, verify the vCenter and ESXi versions before proceeding. Broadcom recommends checking the Product Interoperability Matrix before upgrading.
4. Check hardware and drivers
Verify the server model, storage controller, network adapters, HBA, firmware and drivers against the applicable VMware/Broadcom compatibility information.
A successful software upgrade does not necessarily mean that every hardware component will work correctly with the target ESXi release.
5. Back up the ESXi configuration
Take a configuration backup before starting.
Broadcom documents the following ESXi CLI commands:
vim-cmd hostsvc/firmware/sync_config
vim-cmd hostsvc/firmware/backup_configPre-Upgrade Checklist
Use this checklist before you start the ESXi host upgrade:
- Current ESXi version and build recorded
- Target ESXi version identified
- Supported upgrade path confirmed
- vCenter compatibility checked
- Hardware compatibility checked
- Storage and network adapters verified
- Firmware and driver requirements reviewed
- ESXi configuration backed up
- VM migration/shutdown plan prepared
- Host can enter maintenance mode
- Correct ESXi image/offline bundle downloaded
- Vendor-customized image checked where applicable
- Recovery/rollback plan prepared
- Sufficient storage space available
- Network storage dependencies reviewed
Best 3 ways to upgrade ESXI host:
You can upgrade an ESXi host with version 6.5 or 6.7 by using an interactive upgrade from a CD, DVD/USB/Virtual Media or ISO Mapped with iLO/iDRAC, vSphere Lifecycle Manager (baselines) and ESXCLI Command Line.
Consider disconnecting the network storage before upgrading. By doing this, the installer can find available disc drives more quickly. Any files on the disconnected discs are unavailable at installation when network storage is disconnected. Never unplug a LUN containing an active ESXi installation.
Method 1: Upgrade ESXi Host Using ISO/USB/iLO/iDRAC
Step 1: Obtain the correct ESXi image
Download the ESXi image appropriate for your server and target release.
For branded hardware, check whether a vendor-customized ESXi image or appropriate vendor add-on is required.
Do not use an image simply because it has a newer version number. Confirm hardware, driver and upgrade compatibility first.
Step 2: Put the host into maintenance mode
Before beginning an interactive upgrade, place the ESXi host into maintenance mode and make sure workloads have been migrated or shut down according to your environment.
Step 3: Mount the installation ISO
You can use:
- Physical CD/DVD
- Bootable USB
- iLO virtual media
- iDRAC virtual media
- Another supported remote-console/virtual-media mechanism
Step 4: Boot from the ESXi installer
Restart the server and boot from the selected ESXi installation media.
Follow the installer prompts until the existing ESXi installation and available storage devices are detected.
Step 5: Choose the correct upgrade option
This is one of the most important differences between a genuine upgrade and a fresh installation.
Current Broadcom documentation identifies three relevant installer choices:
- Upgrade ESXi, preserve VMFS datastore
- Install ESXi, preserve VMFS datastore
- Install ESXi, overwrite VMFS datastore
The first option updates the existing ESXi installation while preserving the current settings and VMFS datastore. The third option can erase the existing ESXi installation and VMFS datastore.
Therefore, do not blindly follow an installation procedure that formats the target disk and call it an ESXi upgrade.
If the installer presents an option to overwrite the VMFS datastore, selecting it incorrectly can result in data loss.
Step 6: Confirm the target disk
Carefully identify the correct ESXi installation disk.
This is particularly important when the server contains multiple RAID volumes, local datastores or SAN-connected storage.
Step 7: Complete the upgrade
Follow the installer prompts and allow the upgrade to complete.
Do not interrupt the server during the installation process.
Step 8: Reboot and verify
After the upgrade finishes, reboot the ESXi host.
After booting, verify:
- ESXi version/build
- Management network
- Physical NICs
- Datastores
- Storage adapters
- vCenter connectivity
- VM networking
- Host alarms
Method 2: Upgrade Using vSphere Lifecycle Manager
With vSphere 7 and later, vSphere Lifecycle Manager Images provides an image-based, declarative method of defining the desired ESXi state. The image can include the ESXi version along with vendor add-ons, firmware and drivers.
For newer environments, this is generally the approach to evaluate first.
Step 1: Open Lifecycle Manager
Log in to the vSphere Client and open Lifecycle Manager.
Step 2: Import the ESXi image/offline bundle
Current Broadcom guidance describes importing the offline bundle and using it as the depot/base image for the lifecycle workflow.
Step 3: Configure the cluster image
Select the target cluster and open its Updates section.
Under Image, edit or configure the cluster’s desired ESXi image.
Select the appropriate ESXi base image and configure any required vendor add-on, components, firmware or drivers.
Step 4: Run the pre-check
Before remediation, run the image compliance/pre-check.
This gives Lifecycle Manager an opportunity to identify compatibility or configuration problems before the actual host upgrade.
Broadcom’s current procedure specifically includes running the pre-check and proceeding only after the check completes successfully.
Step 5: Remediate
After the pre-check succeeds, initiate remediation.
Lifecycle Manager can coordinate the upgrade and host reboot as part of the remediation workflow, depending on the environment and configuration.
Method 3: Upgrade ESXi Host Using ESXCLI
Step 1: Put the host into maintenance mode
Before starting the CLI upgrade, place the ESXi host in maintenance mode.
Confirm that required VMs and workloads have been migrated or stopped.
Step 2: Upload the ESXi depot
Download the correct ESXi offline bundle and upload it to a datastore accessible from the host.
For example:
/vmfs/volumes/ISO-Images/The exact datastore path will be different in each environment.
Step 3: Open the directory
For example:
cd /vmfs/volumes/ISO-ImagesStep 4: List the available image profiles
Use:
esxcli software sources profile list -d /vmfs/volumes/<datastore>/<ESXi-depot>.zipThis displays the image profiles contained in the depot.
Do not copy that profile name into your environment. Select the profile that actually exists in the downloaded image.
Step 5: Perform a dry run
Where supported, use the --dry-run option before performing the actual update.
For example:
esxcli software profile update \
-d /vmfs/volumes/<datastore>/<ESXi-depot>.zip \
-p <profile-name> \
--dry-run
A dry run allows the administrator to preview the operation before making the actual change.
Step 6: Perform the upgrade
After verifying the profile and dry-run results, execute the applicable update command.
esxcli software profile update \
--depot <path-to-depot-file> \
-p <ESXi-profile-name>
The exact profile name must match the image you downloaded.
Avoid blindly using --no-sig-check
--no-sig-checkin its example.
Do not automatically add this option to a modern production upgrade. Signature checking is an important security control. Only use an option that bypasses verification when a current official procedure explicitly requires it and you understand the implications.
Step 7: Reboot the ESXi host
After the upgrade completes successfully, reboot the host.
Current Broadcom guidance also lists rebooting the host after the ESXCLI profile update.
Step 8: Verify the ESXi version
After the reboot, verify the installed ESXi version and build.
You can use:
vmware -vlAlso verify the version in the vSphere Client or DCUI where applicable.
Before and After Upgrade Checklist
Before the upgrade
| Check | What to verify |
|---|---|
| ESXi version | Current release and build |
| Target version | Exact target release/build |
| Upgrade path | Supported by Product Interoperability Matrix |
| vCenter | Compatible with target ESXi |
| Hardware | Server and components supported |
| Drivers | NIC/HBA/storage drivers compatible |
| Firmware | Required firmware level |
| Backup | ESXi configuration backed up |
| VM workload | Migrated or powered off as required |
| Storage | Datastores healthy and accessible |
| Recovery | Rollback/recovery procedure available |
After the upgrade
Check the following before declaring the upgrade ESXi host task complete:
- ESXi version and build
- vCenter connectivity
- Host connection status
- Management network
- Physical NICs
- Storage adapters
- VMFS datastores
- SAN/NAS connectivity
- VM networking
- Hardware health
- Host alarms
- Cluster compliance
- VM power operations
Storage deserves particular attention. Broadcom documents cases where VMFS datastores can become unavailable after an ESXi upgrade because of storage or driver-related issues.
Common ESXi Upgrade Problems and How to Avoid Them
1. Unsupported upgrade path
Problem: The target version is not directly supported from the current ESXi build.
Solution: Check the Product Interoperability Matrix before starting. Do not assume that a major-version upgrade is always direct.
2. Hardware incompatibility
Problem: The server boots but a network adapter, HBA or storage controller does not work correctly.
Solution: Check hardware compatibility, driver versions and firmware before upgrading.
3. Wrong ESXi image
Problem: A generic image is used when a vendor-specific image or add-on is required.
Solution: Check the hardware vendor’s supported ESXi image and the corresponding Broadcom compatibility information.
4. Incorrect installer option
Problem: An administrator accidentally selects an option that overwrites VMFS.
Solution: Read the installer options carefully. The “Upgrade ESXi, preserve VMFS datastore” option is different from installing ESXi and overwriting VMFS.
5. Datastore disappears after upgrade
Problem: A local or SAN datastore is missing after reboot.
Solution: Check storage adapters, driver compatibility, VMFS detection and system logs. Broadcom documents multiple storage-related post-upgrade scenarios, including driver incompatibility.
6. Lifecycle Manager pre-check fails
Problem: Remediation cannot proceed.
Solution: Review the compliance/pre-check results, image, hardware compatibility, drivers, firmware and cluster configuration before retrying.
7. ESXCLI upgrade fails
Problem: The command-line update reports an installation or filesystem error.
Solution: Check the depot path, image profile, host storage and available filesystem space. Broadcom has documented ESXCLI upgrade failures caused by inaccessible VMFS filesystem entries.
Frequently Asked Questions
What is the safest way to upgrade an ESXi host?
There is no single method that is safest for every environment. The appropriate method depends on the ESXi version, vCenter version, hardware, cluster architecture and supported lifecycle-management workflow. For managed modern environments, vSphere Lifecycle Manager Images is an important option; ESXCLI and interactive upgrades remain useful in applicable scenarios.
Can I upgrade ESXi without vCenter?
Yes, an individual ESXi host can be upgraded using supported standalone methods such as the ESXi installer or ESXCLI. The appropriate method depends on the target version and environment.
Can ESXi be upgraded using ESXCLI?
Yes. Broadcom documents the esxcli software profile update workflow using an ESXi depot and image profile.
Should I back up the ESXi configuration before upgrading?
Yes. A configuration backup provides an important recovery option. Broadcom documents vim-cmd hostsvc/firmware/sync_config and vim-cmd hostsvc/firmware/backup_config for ESXi configuration backup.
Do I need maintenance mode before upgrading?
Maintenance mode is an important part of supported ESXi upgrade workflows, particularly when using lifecycle management or ESXCLI. Workloads should be migrated or otherwise handled before the host is taken out of service.
How do I verify the ESXi version after an upgrade?
You can verify the version and build from the vSphere Client or ESXi command line. For example:
vmware -vlCan I upgrade directly from ESXi 6.5 to ESXi 8?
Do not assume so. Broadcom’s current guidance identifies unsupported paths from ESXi 6.5 to ESXi 8.0, while supported paths depend on the source release/build. Always verify the exact path in the Product Interoperability Matrix.
Are Lifecycle Manager Baselines still the preferred method?
No. Baselines are a legacy lifecycle-management approach in newer vSphere versions. Broadcom recommends moving to vSphere Lifecycle Manager Images, and major baseline functionality has been removed in vSphere 9.
What happens to VMs during an ESXi host upgrade?
The host generally needs to enter maintenance mode. In a cluster, workloads can often be migrated to another host when the required vSphere features and infrastructure are available. Standalone hosts require a planned VM shutdown or migration strategy.
Should I use a vendor-customized ESXi image?
When your server vendor provides a supported customized image or add-on, verify it against the target ESXi release and hardware configuration. This can be particularly important for vendor-specific drivers and firmware integration.
What should I do if the upgrade fails?
Do not immediately retry the upgrade repeatedly. First record the error, check the upgrade logs and verify the host’s current state. If the host is not operational, use the documented recovery procedure and your configuration backup where applicable.
Conclusion
A successful upgrade ESXi host operation starts well before the actual installation or ESXCLI command. The most important step is to verify that the proposed target version is supported with the existing ESXi build, vCenter version, hardware, drivers and storage environment.
The original source document provides a useful three-method structure: interactive installation media, Lifecycle Manager and ESXCLI. For current environments, however, administrators should recognize that Lifecycle Manager has evolved from the older baseline model toward image-based lifecycle management.
Before pressing Enter on the upgrade, take the configuration backup, confirm the upgrade path, validate the hardware and make sure you have a recovery plan. After the reboot, don’t stop at checking the ESXi build number—verify storage, networking, vCenter connectivity and workloads as well.
Suggested Read:
Thank you! Keep up the good work.