In this article, we are going to learn ‘Step by Step Configure MDT Server (Microsoft Deployment Toolkit) on windows server 2016’. Microsoft Deployment Toolkit is a computer program that allows the deployment of the network of Microsoft Windows and Microsoft Office. From a machine or central server distribution tools like Windows Deployment Services (WDS) or System Center Configuration Manag11er (SCCM), Windows NT and Windows Server 2008 can help to create an automated installation source for the Windows operating system to deploy the Windows operating system. Device Drivers can be included with Windows updates and software builds. All software for installation (operating system, drivers, updates, and applications) is added to available software pools and packaged in distribution packages. The operating system and drivers that are included with this package are selected and the administrator has specified the password, owner information, and the product. The Microsoft Deployment Toolkit generates a customized Windows PE (pre-installation environment) image that allows client machines to install aggregate deployment packages over a network from an MDT server. This can be booted from a Windows PE disk image CD or booted with Windows Deployment Services. When selecting packages to be deployed, the software included in the pool can also be selected for installation.
Microsoft Deployment Toolkit (MDT) supports three types of applications: 1) Zero Touch Installation (ZTI) 2) Light Touch Installation (LTI), and 3) User-Driven Installation (UDI). ZTI is a fully automated deployment plan that does not require any interaction with any user for installation. UDI deployment requires complete manual intervention to respond to each installation prompt, such as machine name, password, or language settings. Both ZTI and UDI deployment require Microsoft System Center Infrastructure. ZTI applications require a constant network connection at the point of delivery. LTi deployment requires limited user interaction. There are very few basic infrastructure requirements for LTI deployment, so they can be installed from a network share or media using a USB flash drive or optical disc.
Features Of MDT (Microsoft Deployment Toolkit):
MDT has many useful features, the most important of which are:
- Windows Client support
- Windows Server support
- Additional operating systems support
- UEFI support.
- GPT support
- Enhanced Windows PowerShell support.
- Add local administrator accounts
- Automated participation in CEIP and WER
- Deploy Windows RE(Windows Recovery Environment)
- Deploy to VHD(virtual hard disk )
- Deployments Monitoring
Prerequisites to Configure MDT Server (Microsoft Deployment Toolkit):
1) Install and Configure WDS Server for Configure MDT Server:
Before Configure MDT Server, the WDS server should be ready. In the previous article, we learned ‘Step by Step Configure WDS Server (Windows Deployment Services) On Windows Server 2016‘.
2) Download and install the Windows ADK for Configure MDT Server:
In the Windows Assessment and Deployment Kit (Windows ADK), you have the necessary tools to customize Windows images for large scale deployment and to monitor your system’s quality, performance, and its current components and applications running on it.
Step 1. Download ADK from the above links and install it. To provide a specific location for the Windows ADK, or to set the default location and click on next.

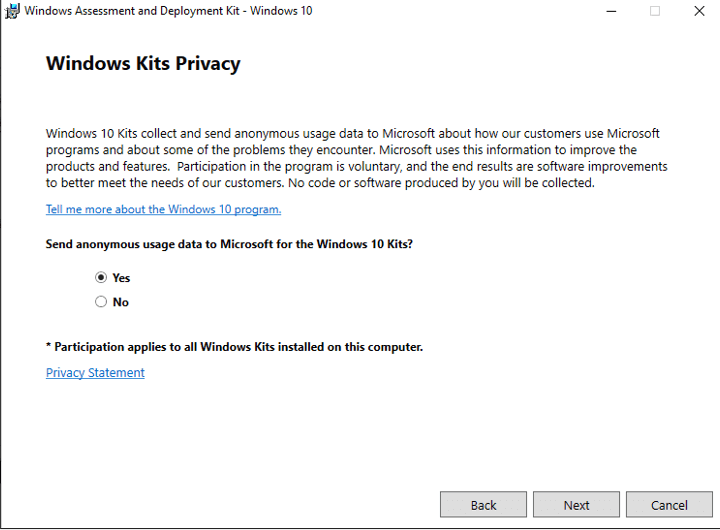
Step 2. Select the windows Privacy level for the download
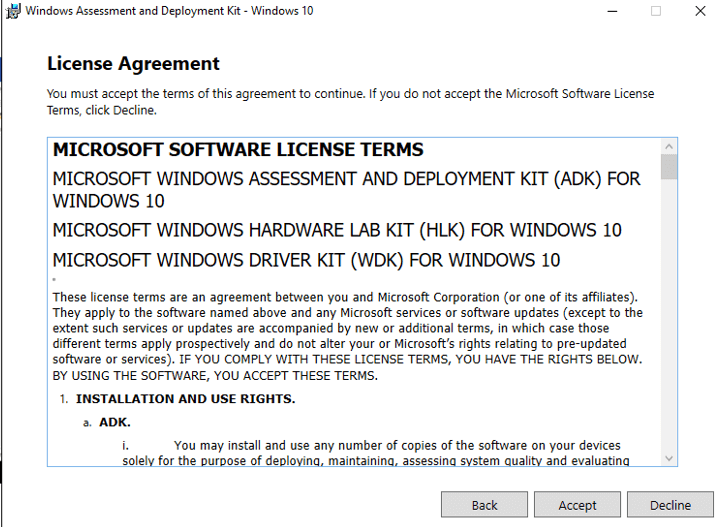
Step 3. Accept the License Agreement.
Step 4. Select the following mandatory features. You can select more if you need others. Click Install.

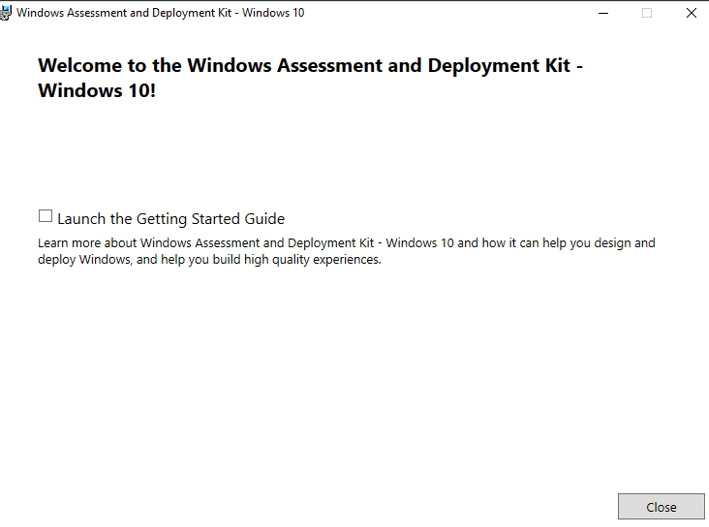
Step 5. As you can see on the output above we have successfully installed the ADK.
3) Download and install the Windows PE add-on for MDT Server:
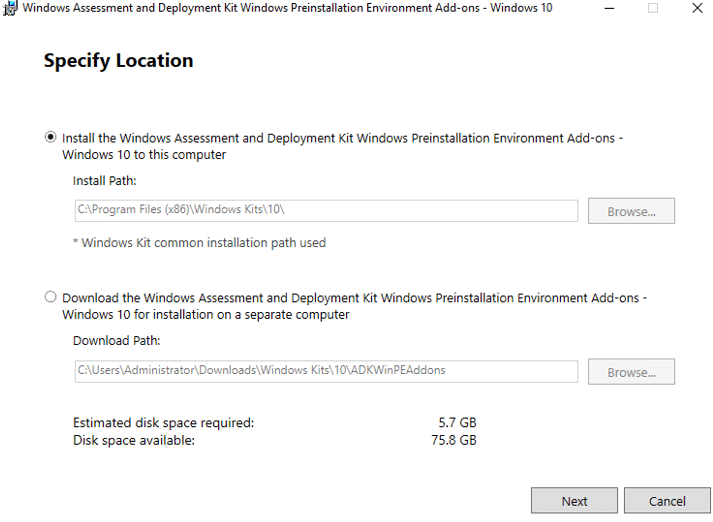
Step 1. Download the Windows PE add-on from the above links and install it. To provide a specific location for the Windows PE add-on, or to set the default location and click on next.
Step 2. Select the windows Privacy level for the download
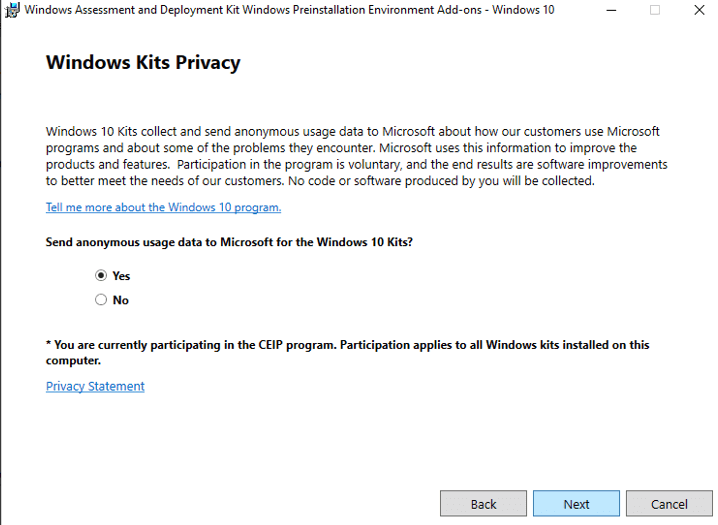
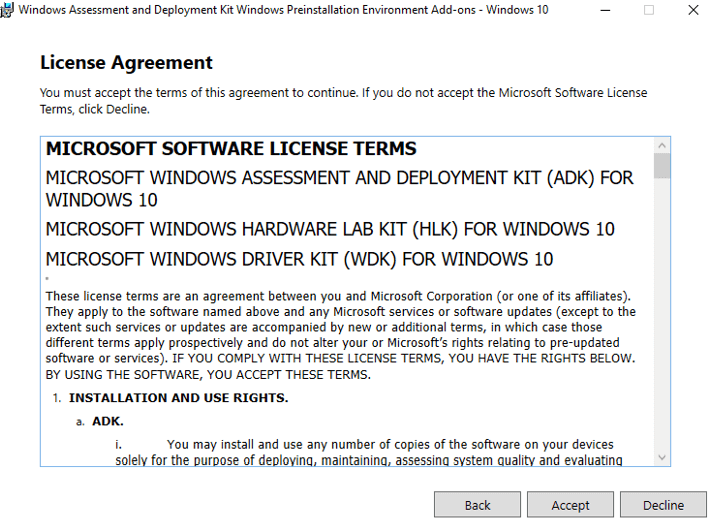
Step 3. Accept the License Agreement.
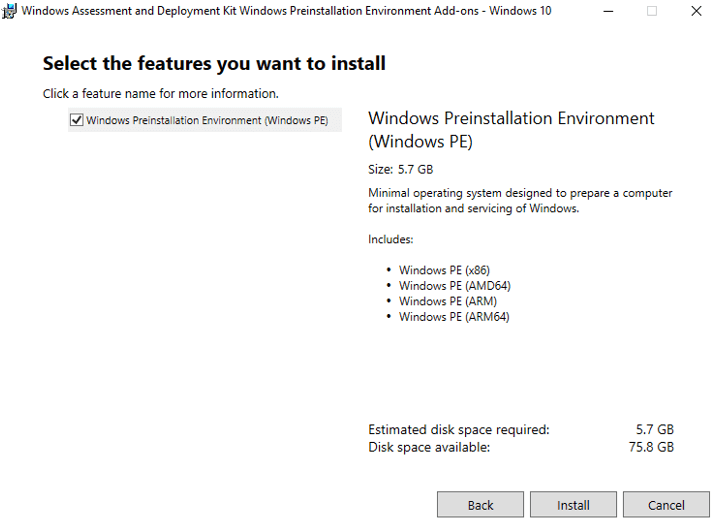
Step 4. Select the Windows Preinstallation Environment (Windows PE).
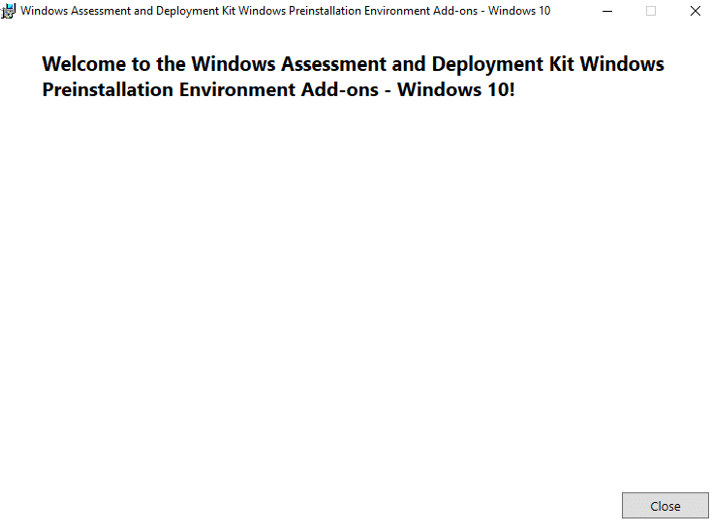
Step 5. As you can see on the output above we have successfully installed the Windows PE add-on.
Follow the below Steps To Install and Configure MDT Server (Microsoft Deployment Toolkit) on windows server 2016:
Now let’s go ahead and download Microsoft Deployment Toolkit (MDT) using the below link.
Microsoft Deployment Toolkit (MDT)
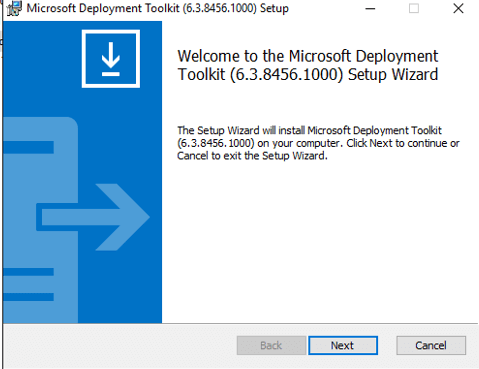
Step 1. Once each of the five files has been downloaded, launch ‘MicrosoftDeploymentToolkit_x64′ and click on next.
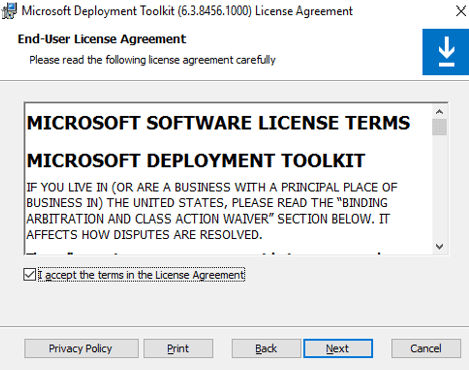
Step 2. Accept the License Agreement.
Step 3. Just click on next.

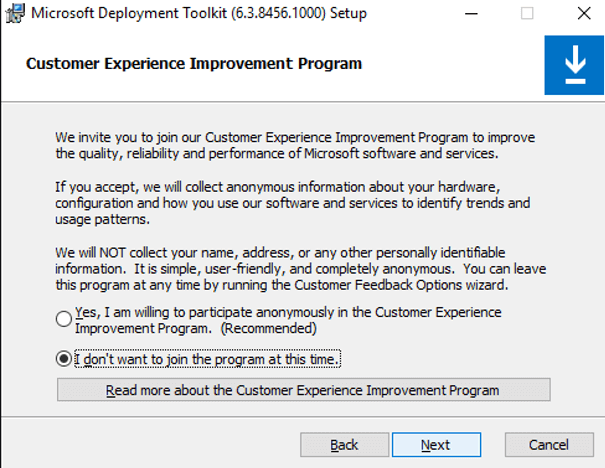
Step 4. Select the Customer Experience Improvement Program and click on next.
Step 5. Now let’s go ahead and install Microsoft Deployment Toolkit (MDT).

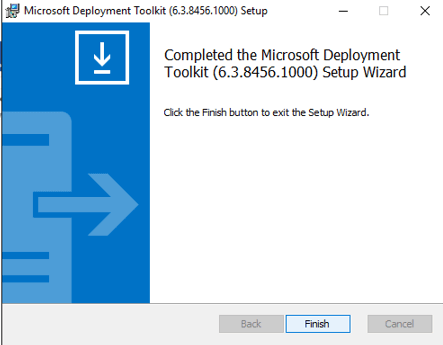
Step 6. As you can see on the output above we have successfully installed the Microsoft Deployment Toolkit (MDT).
Configuration of Microsoft Deployment Toolkit (MDT)
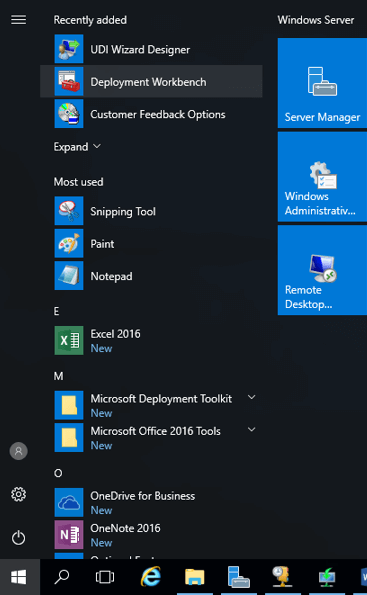
Step 1. You can open the Microsoft Deployment Toolkit (MDT) application using Search your computer box. Refer to the snapshot below.
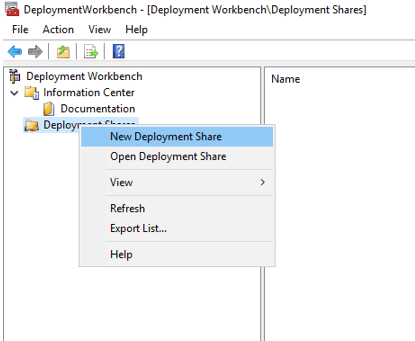
Step 2. After the Microsoft Deployment Toolkit (MDT) application Open, right-click on Deployment Shares in the left navigation and select New Deployment Share.
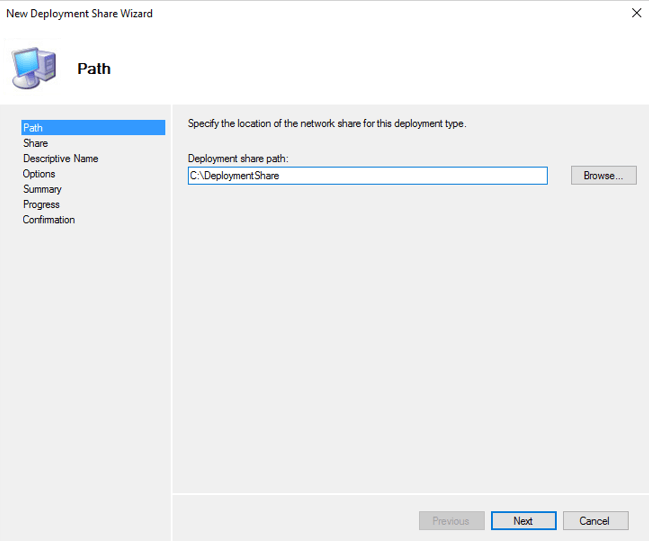
Step 3. Change the Deployment share path or leave the default and click next:
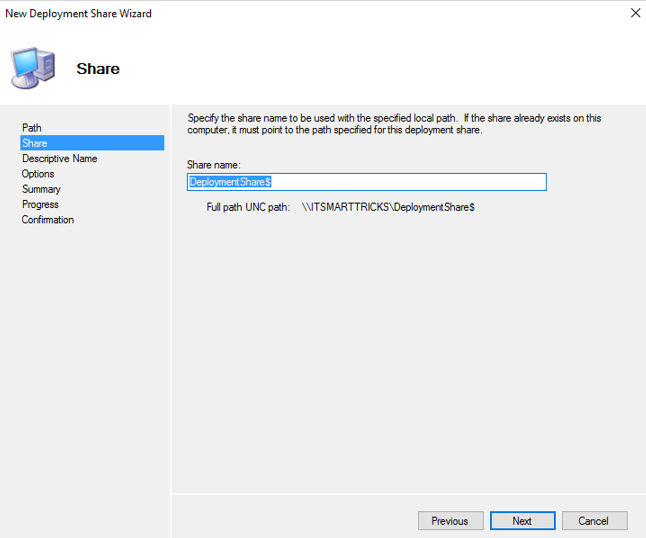
Step 4. Rename the Deployment share name or leave the default and click next.
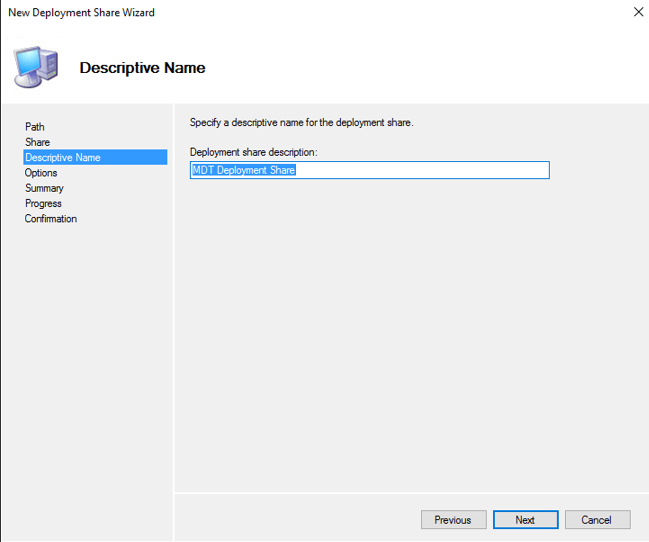
Step 5. Change the Deployment share description or leave the default and click next.
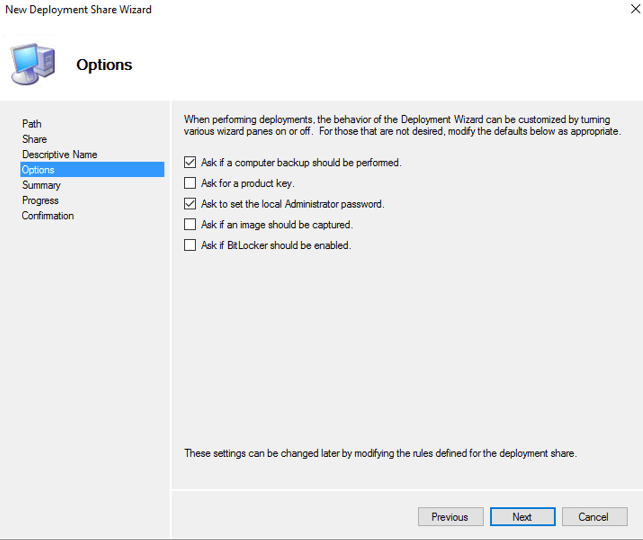
Step 6. Review and uncheck each default option and click Next.
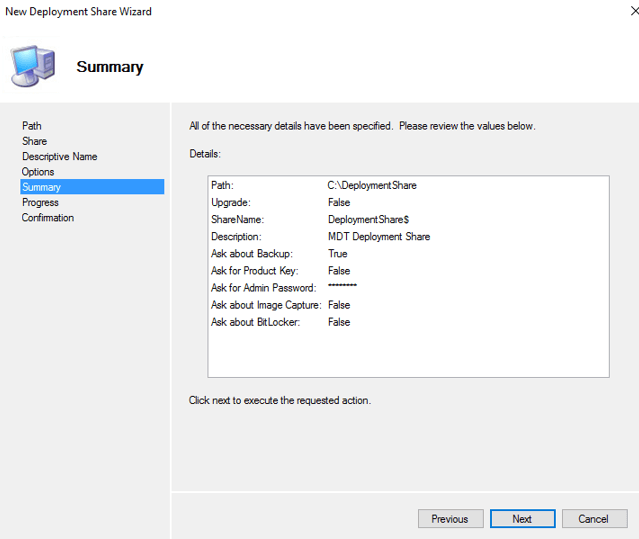
Step 7. Review Summary and click Next.
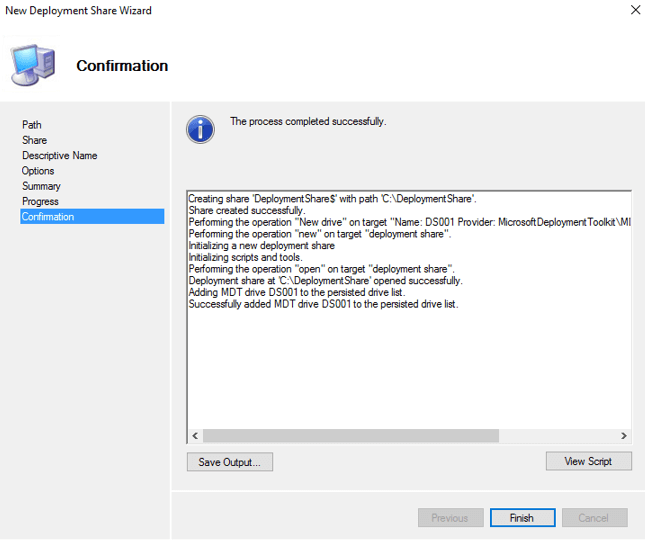
Step 8. As you can see on the output above we have successfully configured MDT, Now Click on Finish.
Import Operating System:
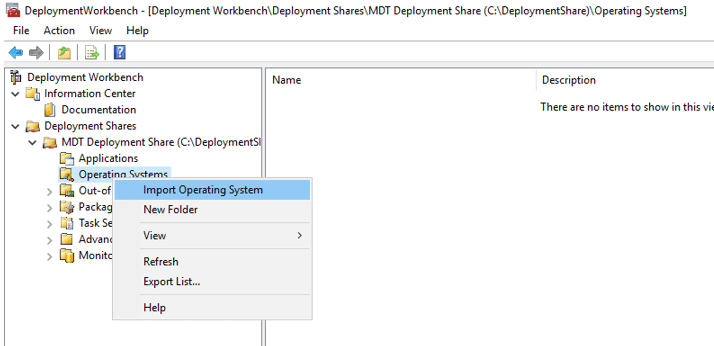
Step 1. In the Deployment Workbench, right-click Operating System and select Import Operating System.
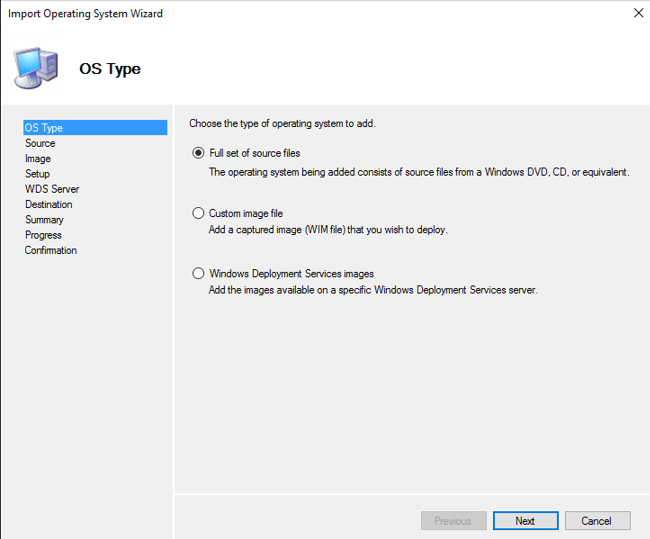
Step 2. Select Full set of source files and click Next.
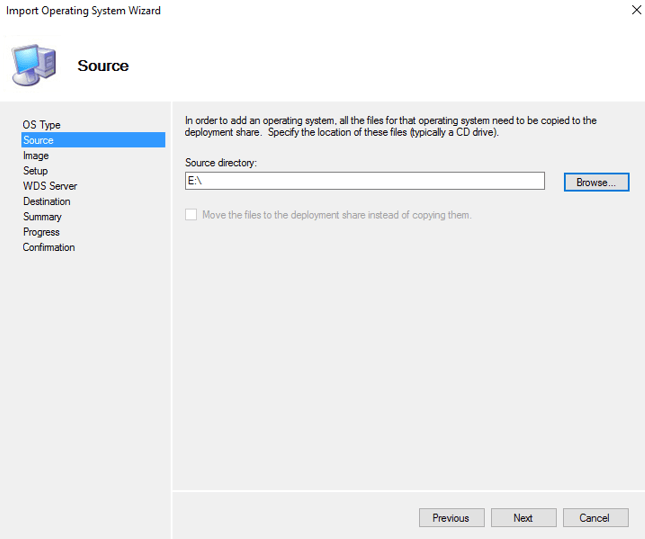
Step 3. Type E:\ to use the recently mounted ISO. Click Next.
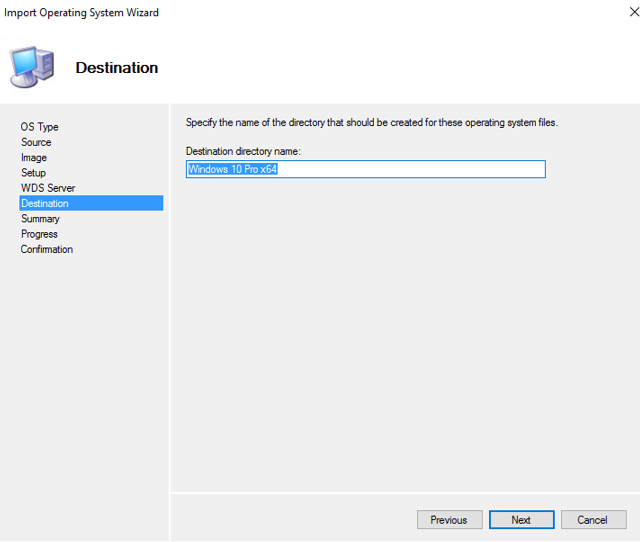
Step 4. Enter a destination directory name and click Next:
Step 5. Click Finish.
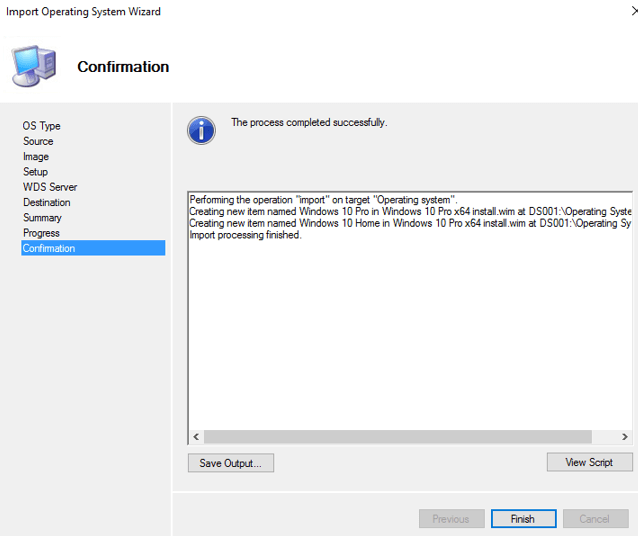
Step 6. As you can see on the output above we have successfully imported Operating System.

Add New Application:
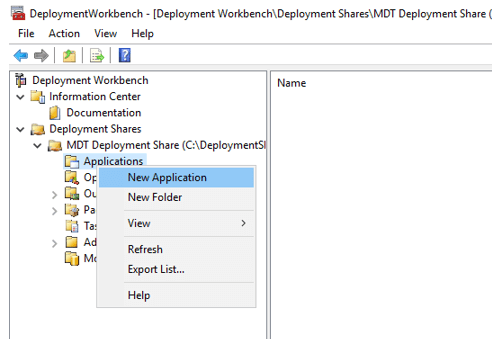
Step 1. Right-click the application node. To launch the new app wizard, select the new app from the context menu.
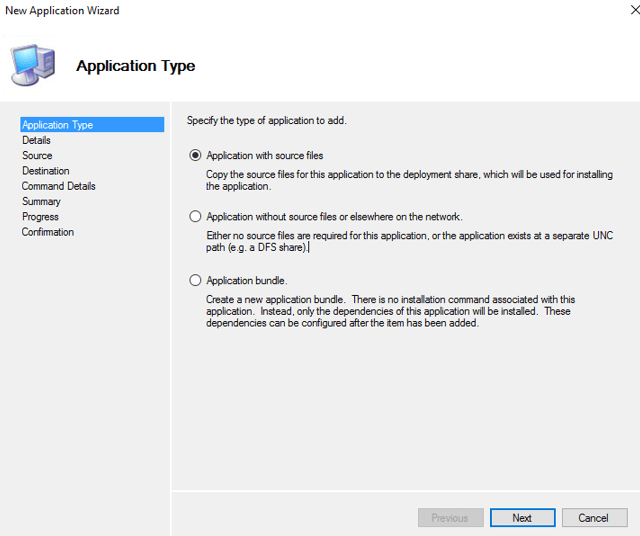
Step 2. On the first page, select the type of application you want to configure. Selecting the radio button near the application with source files is the most common application type that will be used. This option will import the application files directory into the directory containing the delivery file. Selecting the radio button for application without source files or networks elsewhere, will add file links to UNC paths or DFS sharing and be best suited for applications that are stored on application servers or applications distributed from centralized repositories. Finally, selecting the application bundle will add applications rather than the app dependencies of fully installed apps. This choice is usually associated with an internal application or web/cloud-based software. Click the button next to continue.
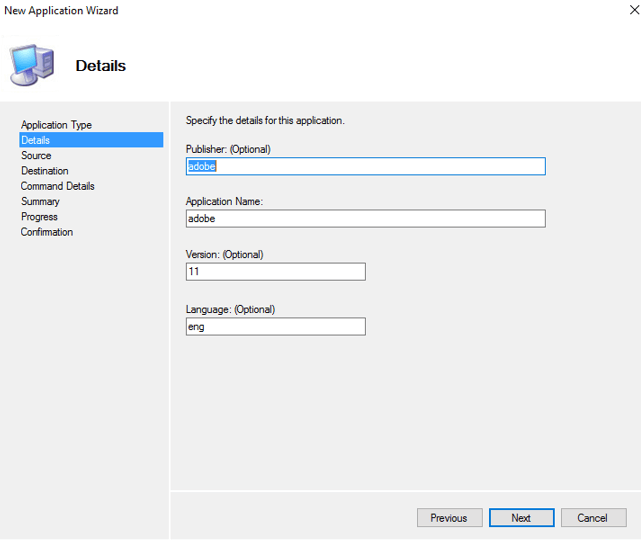
Step 3. On the details page, you will be asked to enter information about the application being added. Other fields occupy important information only when the name of the application is required, which can be beneficial when troubleshooting applications on the road are installed.
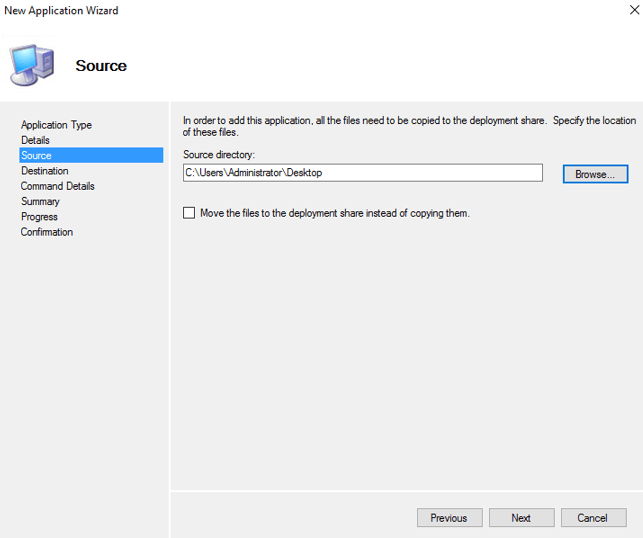
Step 4. Now browse the location to provide a source folder for source import from an MDT server. Click Next to go to the destination page, where you will need to enter a name for the directory that will be created in the distribution sharing to store your imported applications.
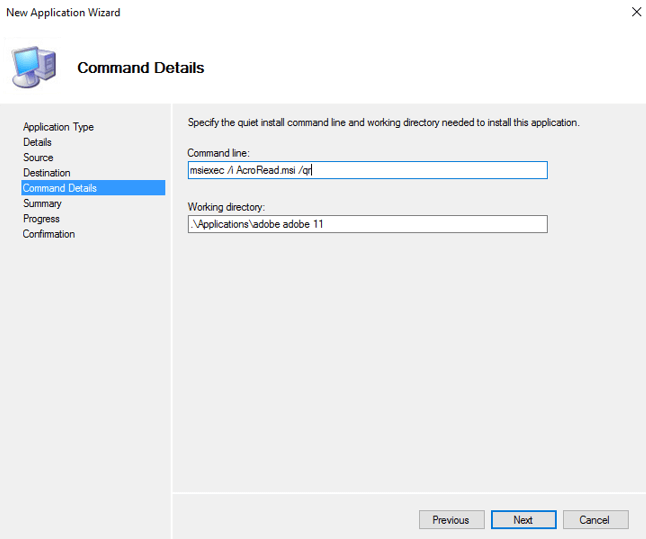
Step 5. The following wizard page will display the working directory, which will be used by MDT to call during the installation. You do not want to modify it until this entry is usually set to the user. However, the command line box will not be populated and must be manually entered for the application to work quietly (and properly). Enter the name of the executable installation file and if any/all switches are needed to obtain a silent installation, click next to continue.
Step 6. The final page summary of the wizard will explain, exactly what will be imported into MDT.

Step 7. Once an application is added to the MDT, the expanded application node will display in the order of the order

Create New Task:
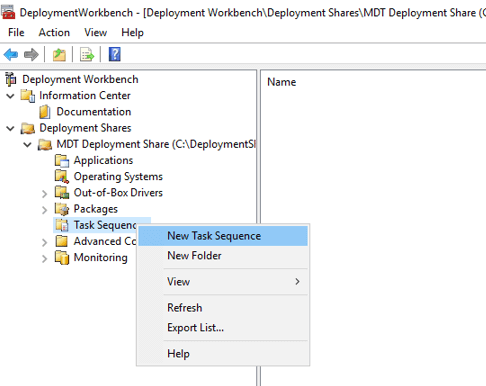
Step 1. Right-click Task Sequence and select New Task Sequence.
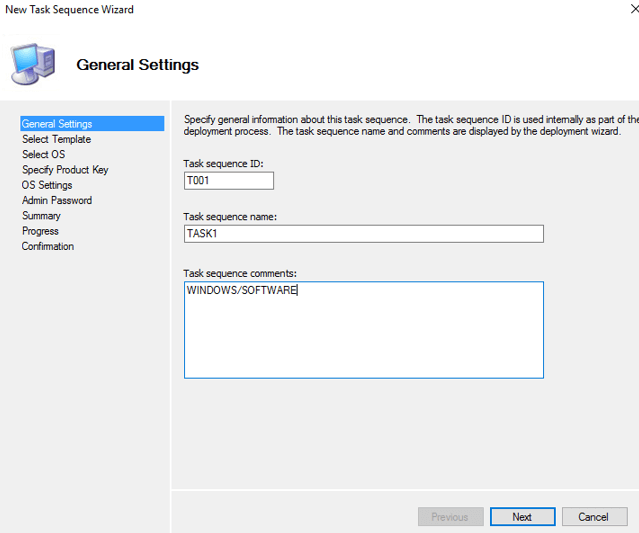
Step 2. Enter general Task sequence settings.
Step 3. Select Standard Server Task Sequence from the drop-down and click Next.
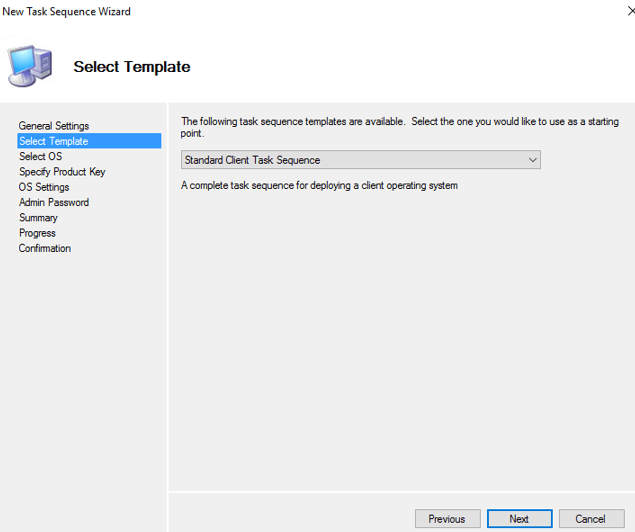
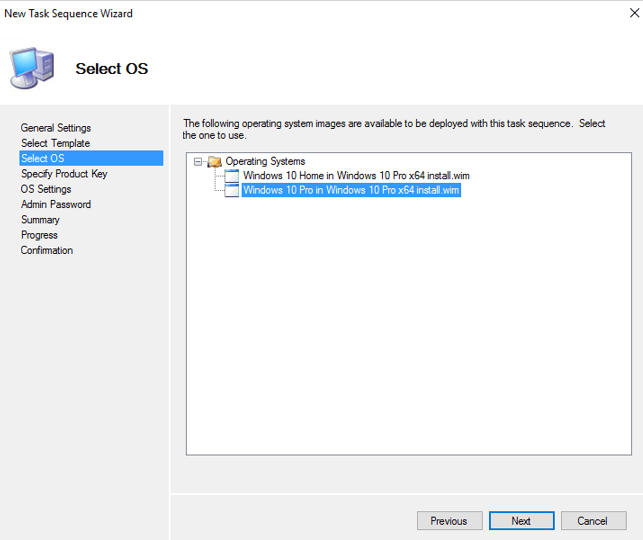
Step 4. Select the Operating System from the list which is you imported and click Next.
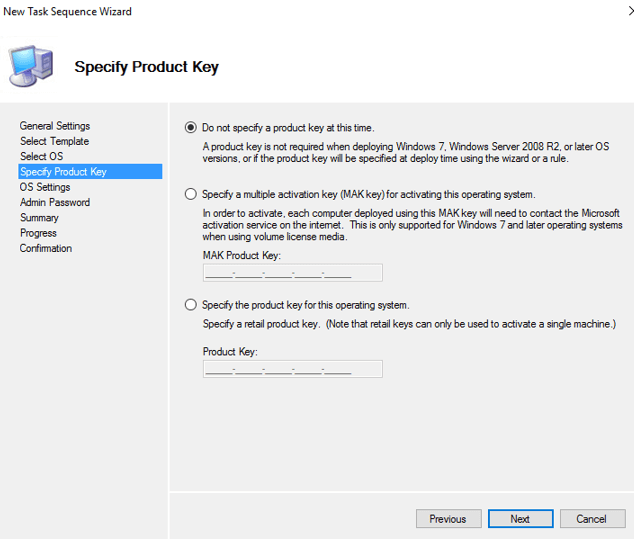
Step 5. Your choice to enter a Windows product key, or do this later. Click Next.
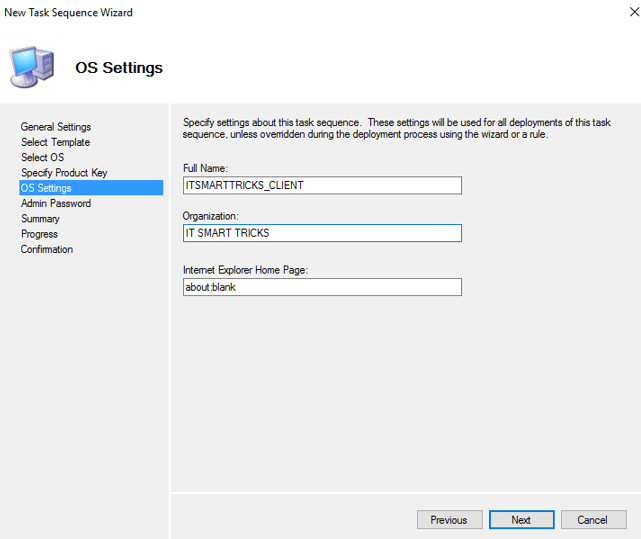
Step 6. Enter a name, organization, and home page, then click on Next.
Step 7. Use the Admin password or do not use it.
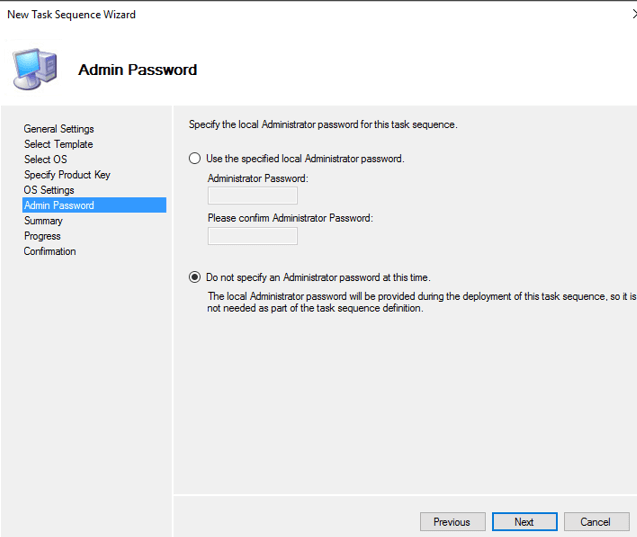
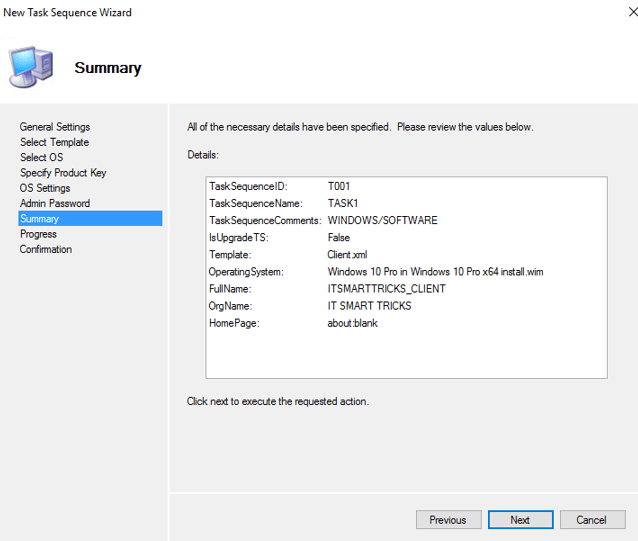
Step 8. Check Summary and Click on Next.
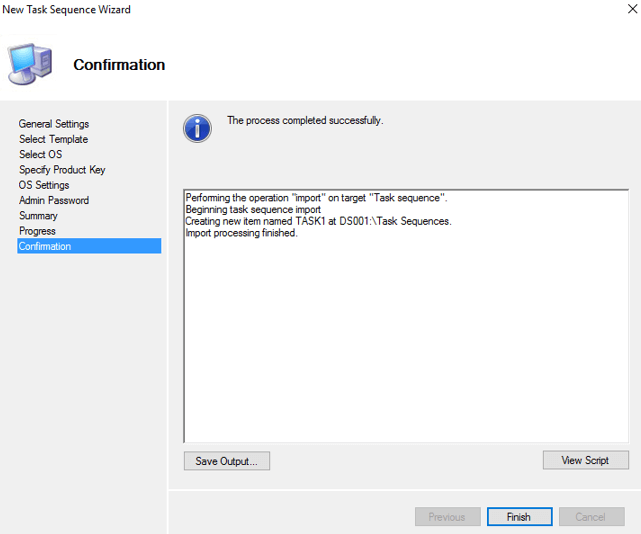
Step 9. As you can see on the output above we have successfully created a task. now Click on Finish.
Update Deployment Share:
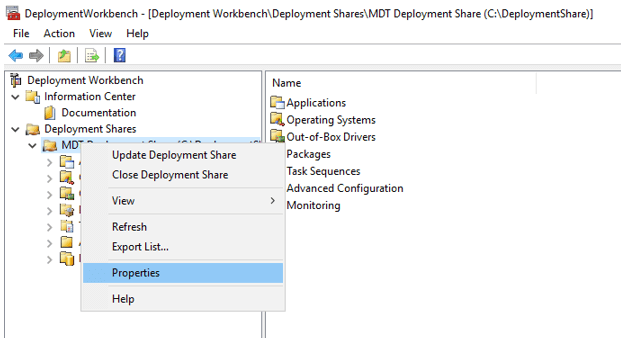
Step 1. If you want to change Deployment share properties settings, Right-click on MDT and open properties.
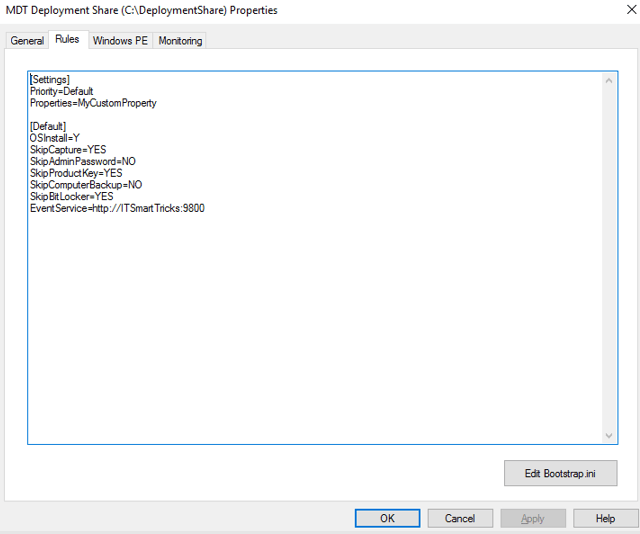
Step 2. Change the Deployment share Rule or leave the default and click ok.
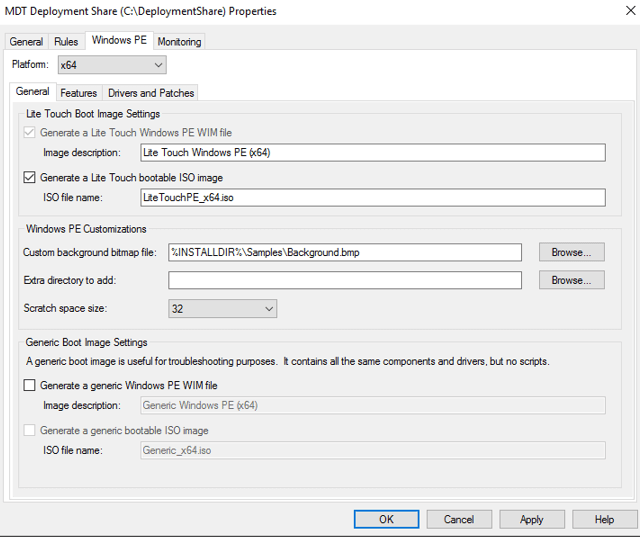
Step 3. Change the Deployment share Windows PE Settings or leave the default and click ok.
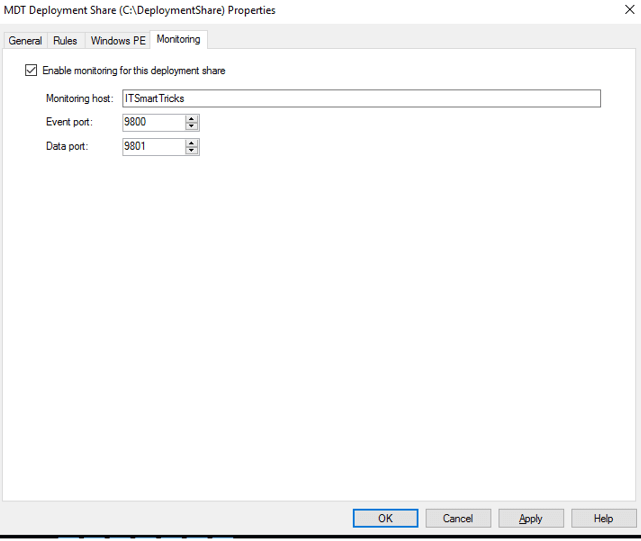
Step 4. If you want to enable Monitoring to check on the below box and monitor Deployment prosses.
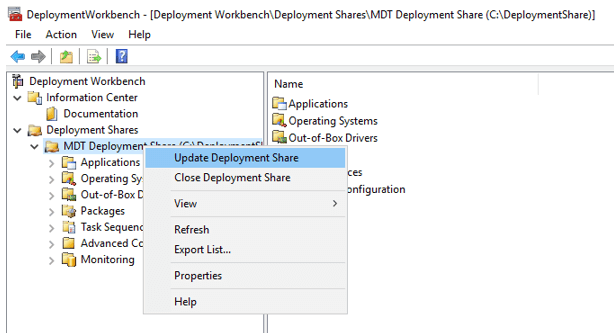
Step 5. Now you can Update Deployment Share Setting.
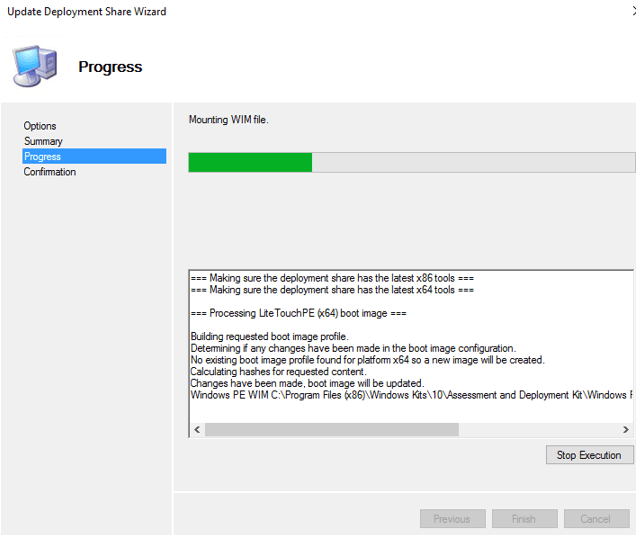
Step 6. Deployment Share Setting updating in prosses.
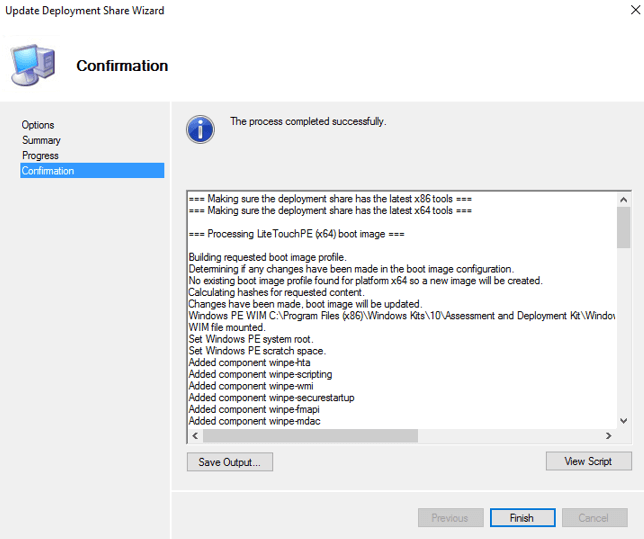
Step 7. As you can see on the output above we have successfully updated the Deployment Share folder. now click on finish.
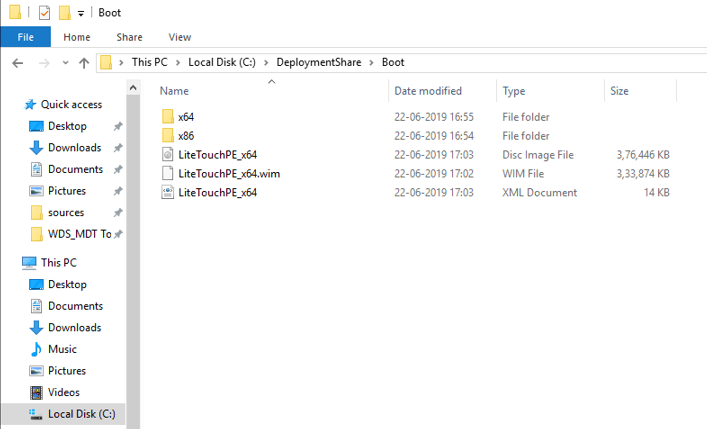
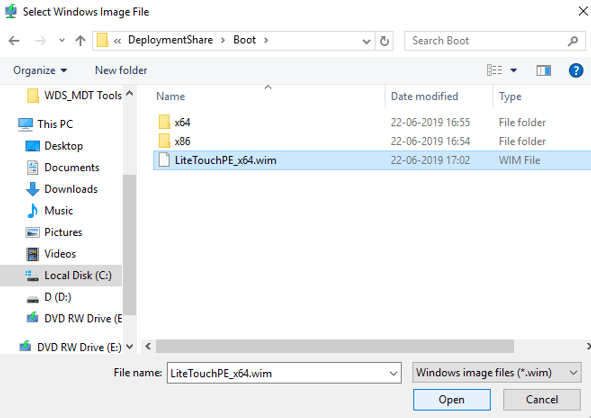
Step 8. After updating the Deployment Share folder, a LiteTouch WIM file will be created.
Add LiteTouch Boot Image to WDS:
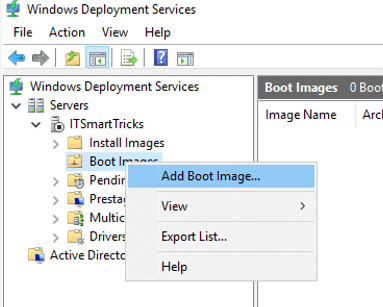
Step 1. In the Windows deployment services console, right-click boot image.
Step 2. Click on the Add boot image.
Step 3. Browse to Deployment Share folder and locate LiteTouch WIM.
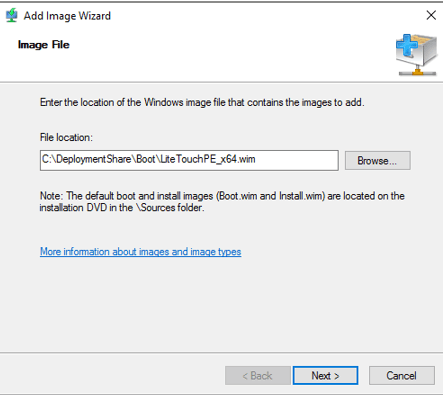
Step 4. Click Next.
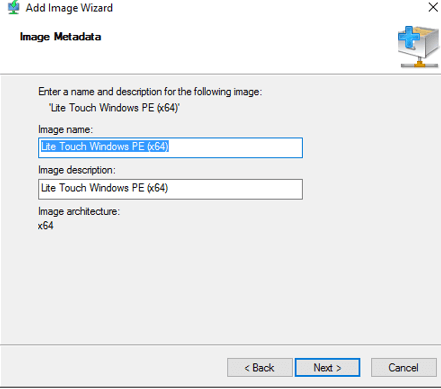
Step 5. Change the Image name and description or leave the default and click Next.
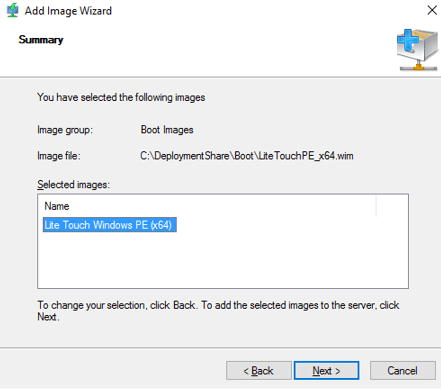
Step 6. Review Summary and click Next.
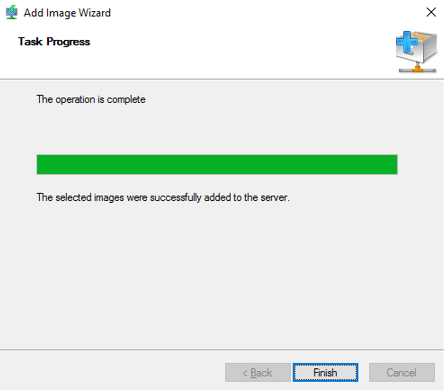
Step 7. As you can see on the output above we have successfully imported the LiteTouch WIM file, Now Click on Finish.
Deploy Windows with MDT:
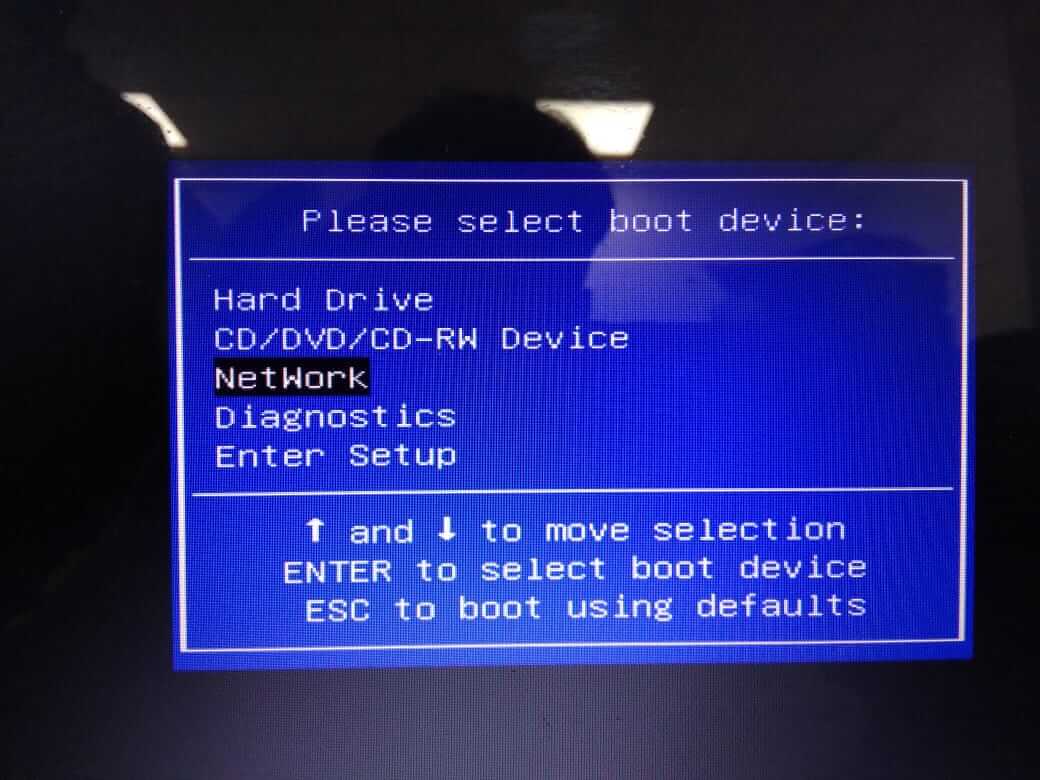
Steps 1. The client will want to install the Windows os of the system. First of all, connect the first server to the client computer with LAN cable. Steps 2. Boot Client System With Network.
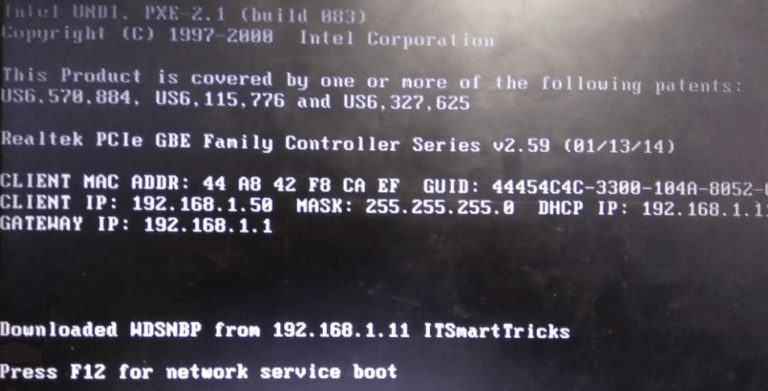
Steps 3. Check WDS IP and Hostname and press F12 to Deploy Windows.
Step 4. The machine is booting via network and windows os files loading starts.

Step 5. Select LiteTouch Windows and press enter.

Step 6. Run the Deployment Wizard to install a new operating system.
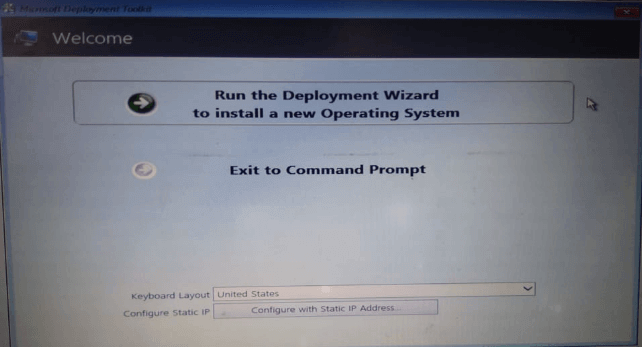
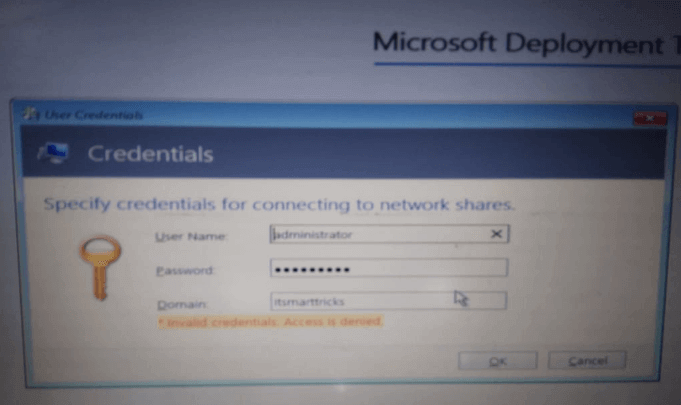
Step 7. Enter WDS Credentials and connect WDS and MDT Server.
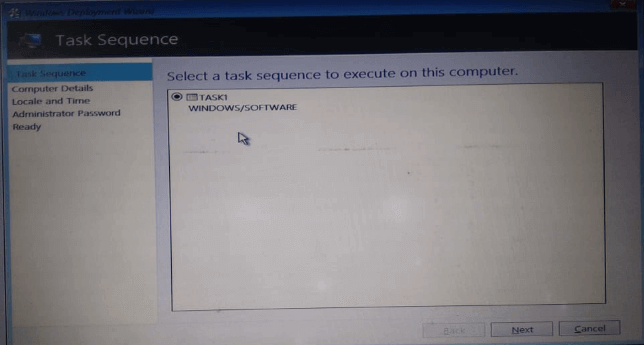
Step 8. Select Task and click on enter.
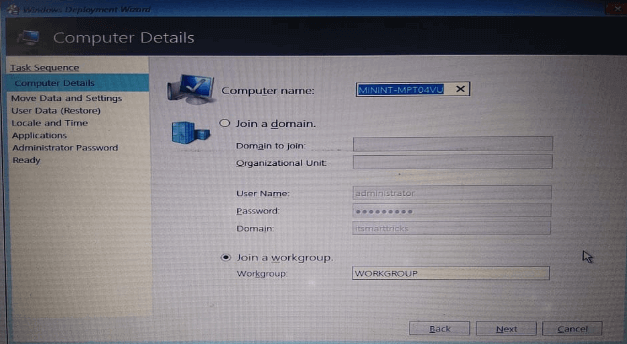
Step 9. If you have configured ad AD/DNS on the server of WDS, you can select this domain or else select workgroup.
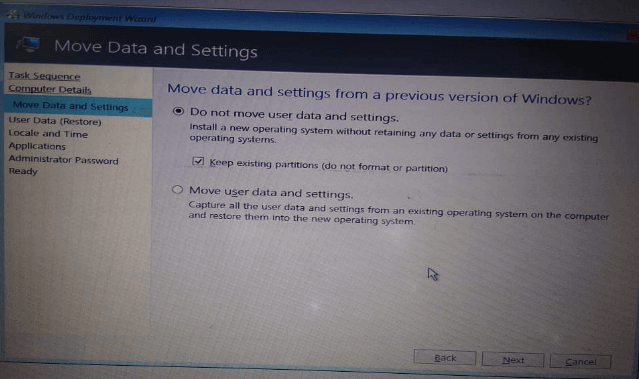
Step 10. Move data and setting or leave the default and click Next.
Step 11. If you want to restore the data, enter the path of the data restores.

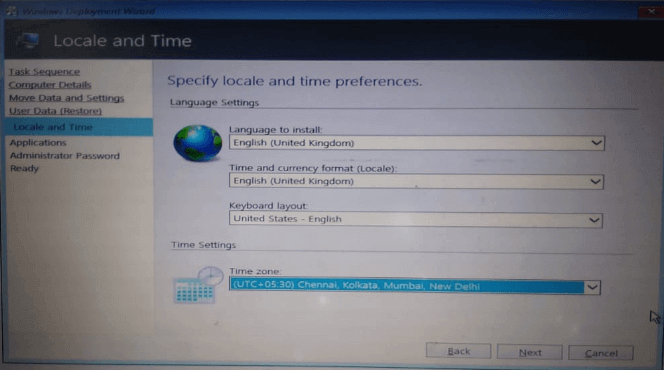
Step 12. select your language and time.
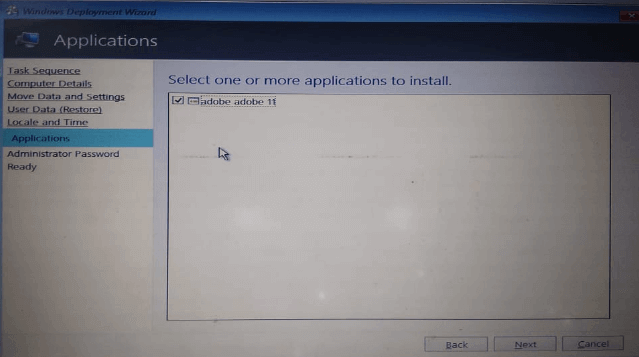
Step 13. Select Application and click next.
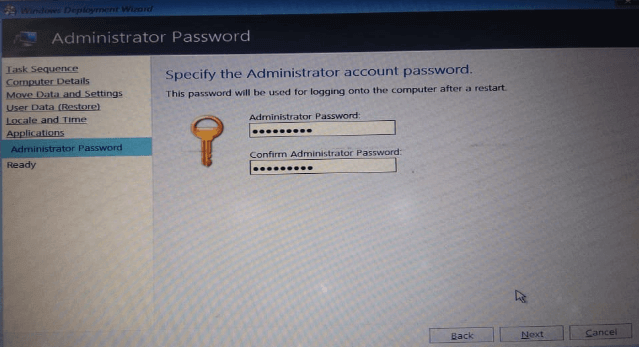
Step 14. Enter Administrator Password and click on next.
Step 15. Click on Begin to start OS deploy.
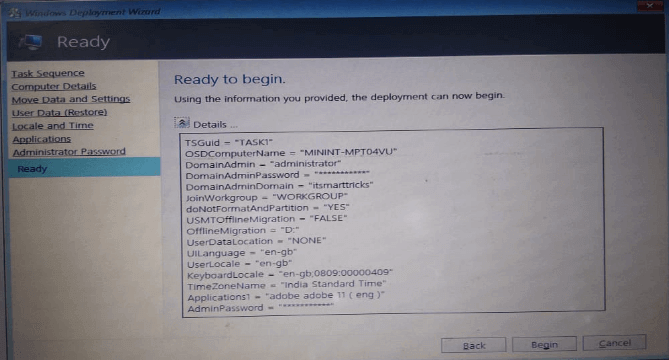
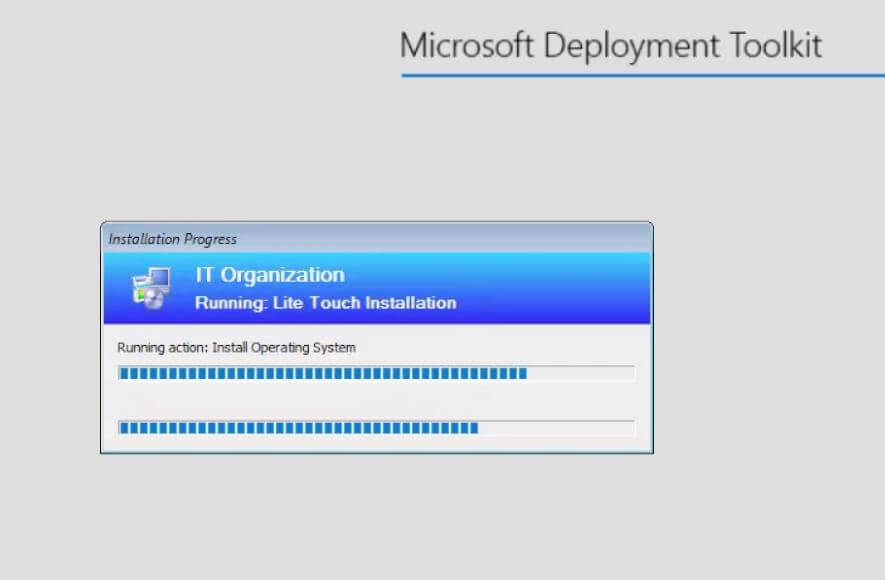
Step 16. Now you can see the Window Deploy has started with MDT.
That’s all, In this article, we have explained step by Step Configure MDT Server (Microsoft Deployment Toolkit) on windows server 2016. I hope you enjoy this article. If you like this article, then just share it. If you have any questions about this article, please comment.
