A LAMP stack package is composed of hosting websites and apps. In this case, Apache, MySQL/MariaDB, and PHP packages are installed on the Linux system. PhpMyAdmin is a free and open-source organization that manages MySQL and MariaDB databases. In this article, we will explain a fresh Install LAMP Stack with PhpMyAdmin in Ubuntu.
Follow the below Steps to Install LAMP Stack with PhpMyAdmin in Ubuntu:
To install LAMP Stack, the Ubuntu 18.04 server should be installed. It also requires access to the server via SSH and requires root user privileges or sudo commands to execute all the commands.
Install Apache Web Server:
To update the software packages first, use ‘sudo apt update‘ command.
itsmarttricks@mangesh:~$ sudo apt update
[sudo] password for itsmarttricks:
Ign:1 http://dl.google.com/linux/chrome/deb stable InRelease
Hit:2 http://dl.google.com/linux/chrome/deb stable Release
Hit:3 http://in.archive.ubuntu.com/ubuntu bionic InRelease
Get:4 http://security.ubuntu.com/ubuntu bionic-security InRelease [83.2 kB]
Hit:5 http://repo.mysql.com/apt/ubuntu bionic InRelease
Get:7 http://in.archive.ubuntu.com/ubuntu bionic-updates InRelease [88.7 kB]
Get:8 http://security.ubuntu.com/ubuntu bionic-security/main amd64 DEP-11 Metada
Now use the following command to install Apache Web Server.
itsmarttricks@mangesh:~$  sudo apt install apache2
Reading package lists... Done
Building dependency tree
Reading state information... Done
Suggested packages:
  apache2-doc apache2-suexec-pristine | apache2-suexec-custom
The following NEW packages will be installed:
  apache2
0 upgraded, 1 newly installed, 0 to remove and 37 not upgraded.
Need to get 0 B/95.1 kB of archives.
After this operation, 532 kB of additional disk space will be used.
Selecting previously unselected package apache2.
(Reading database ... 127171 files and directories currently installed.)
Preparing to unpack .../apache2_2.4.29-1ubuntu4.2_amd64.deb ...
Unpacking apache2 (2.4.29-1ubuntu4.2) ...
Processing triggers for ufw (0.35-5) ...
Setting up apache2 (2.4.29-1ubuntu4.2) ...
The Apache service will automatically start after the installation of the Apache Web server. Enter the following command to check the Apache Web Server running status.
itsmarttricks@mangesh:~$ sudo systemctl status apache2
● apache2.service - The Apache HTTP Server
Loaded: loaded (/lib/systemd/system/apache2.service; enabled; vendor preset:
Drop-In: /lib/systemd/system/apache2.service.d
└─apache2-systemd.conf
Active: active (running) since Sun 2018-08-19 19:09:23 IST; 3min 3s ago
Main PID: 20196 (apache2)
Tasks: 55 (limit: 2263)
CGroup: /system.slice/apache2.service
├─20196 /usr/sbin/apache2 -k start
├─20197 /usr/sbin/apache2 -k start
└─20198 /usr/sbin/apache2 -k start
If you have a firewall system, 80 and 443 ports will need to be opened, so client requests HTTP and HTTPS connections to the Apache web server. Reload the firewall settings by entering the following commands.
itsmarttricks@mangesh:~$ sudo ufw allow 80/tcp
[sudo] password for itsmarttricks:
Rules updated
Rules updated (v6)
itsmarttricks@mangesh:~$ sudo ufw allow 443/tcp
Rules updated
Rules updated (v6)
itsmarttricks@mangesh:~$ sudo ufw reload
Firewall not enabled (skipping reload)
Now verify your Apache installation by testing the default test page by entering the URL ‘http://localhost/’ at the web browser.
http://localhost/ Or http://domain_name/ Or http://SERVER_IP/
Now you can see the Apache default web page, which means your install fine is OK.

Also Read- How To Configure the Proxy Server On Linux Using Terminal.
Install MariaDB:
Now let’s install MariaDB. This is an open source database management system.
itsmarttricks@mangesh:~$ sudo apt install mariadb-server mariadb-client
[sudo] password for itsmarttricks:
Reading package lists... Done
Building dependency tree Reading state information... Done
See if MariaDB services are started automatically.
itsmarttricks@mangesh:~$ sudo systemctl status mysql
To keep MariaDB safe, use the following command security script and set the root password.
itsmarttricks@mangesh:~$ sudo mysql_secure_installation
After entering the above command, set up the root password and then enter the yes/y for the following security questions:
- Set root password? [Y/n]:
y - Remove anonymous users? (Press y|Y for Yes, any other key for No) :
y - Disallow root login remotely? (Press y|Y for Yes, any other key for No) :
y - Remove test database and access to it? (Press y|Y for Yes, any other key for No) :
y - Reload privilege tables now? (Press y|Y for Yes, any other key for No) :
y
Also Read- How to Install MySQL 8.0 in Ubuntu
Install PHP:
PHP is a language used to create dynamic content in websites and apps. You install the PHP for the web application using the following commands.
itsmarttricks@mangesh:~$ sudo apt install php php-common php-mysql php-gd php-cli
Reading package lists... Done
Building dependency tree
Reading state information... Done
php is already the newest version (1:7.2+60ubuntu1).
php-common is already the newest version (1:60ubuntu1).
php-common set to manually installed.
php-gd is already the newest version (1:7.2+60ubuntu1).
php-gd set to manually installed.
php-mysql is already the newest version (1:7.2+60ubuntu1).
php-mysql set to manually installed.
The following NEW packages will be installed:
php-cli
0 upgraded, 1 newly installed, 0 to remove and 37 not upgraded.
Need to get 3,160 B of archives.
After this operation, 12.3 kB of additional disk space will be used.
Do you want to continue? [Y/n] y
Get:1 http://in.archive.ubuntu.com/ubuntu bionic/main amd64 php-cli all 1:7.2+60ubuntu1 [3,160 B]
Fetched 3,160 B in 1s (2,746 B/s)
Selecting previously unselected package php-cli.
(Reading database ... 129738 files and directories currently installed.)
Preparing to unpack .../php-cli_1%3a7.2+60ubuntu1_all.deb ...
Unpacking php-cli (1:7.2+60ubuntu1) ...
Setting up php-cli (1:7.2+60ubuntu1) ...
To test PHP after installing it, use the following command to create an info.php page.
itsmarttricks@mangesh:~$ echo "<?php phpinfo(); ?>" | sudo tee /var/www/html/info.php
Now enter the URL ‘http://localhost/file.php‘ in the web browser and check the PHP information page.
http://localhost/file.php OR http://domain_name/info.php OR http://SERVER_IP/info.php

Also Read- How To Install Python 3.6 on Linux Using Terminal Interface.
Install PhpMyAdmin:
Finally, install phpMyAdmin for managing MySQL database, enter the following command.
itsmarttricks@mangesh:~$ sudo apt install phpmyadmin
Reading package lists... Done
Building dependency tree
Reading state information... Done
phpmyadmin is already the newest version (4:4.6.6-5).
Just select the apache when installing phpMyAdmin.
Set my password to PHPMyAdmin for the MySQL database user.

Also Read- How To Force Users To Change Their Linux LDAP Password.
After install lamp stack applications, now enter the following command and restart the apache2 service.
itsmarttricks@mangesh:~$ sudo systemctl restart apache2
Note: Run the following command if the PhpMyAdmin package is not automatically enabled with the Apache Web server.
itsmarttricks@mangesh:~$ sudo cp /etc/phpmyadmin/apache.conf /etc/apache2/conf-available/phpmyadmin.conf
itsmarttricks@mangesh:~$ sudo a2enconf phpmyadmin
Conf phpmyadmin already enabled
itsmarttricks@mangesh:~$ sudo systemctl restart apache2
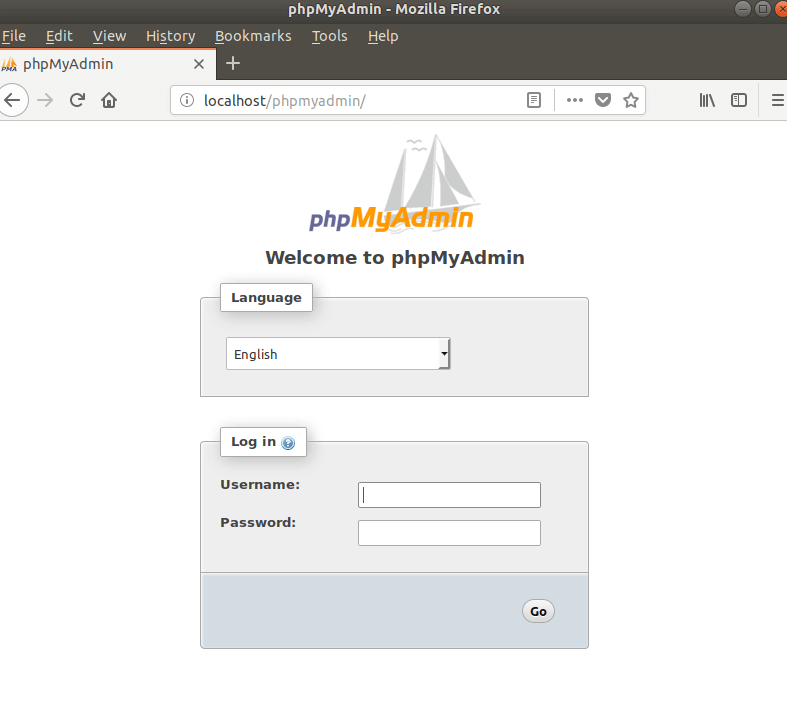
Finally, enter the URL of ‘http://localhost/phpmyadmin/‘ in the web browser.
http://localhost/phpmyadmin/ Or http://domain_name/phpmyadmin Or http://SERVER_IP/phpmyadmin
Enter the root password to be authenticated in phpMyAdmin as shown in the snapshot below.

Also Read-Top Basic Linux Commands for Beginners.
When PhpMyAdmin is logged in, you can manage your database in it. That’s it! In this article, we have explained how to install LAMP Stack with PhpMyAdmin in Ubuntu. I hope you enjoy this article. If you like this article, then just share it. If you have any questions about this article, please comment.
Hello colleagues, its fantastic paragraph regarding teachingand fully explained, keep it up all
the time.