
In this article, we are going to discuss How to Install Nagios Core on CentOS/Redhat. Nagios Core is an Open Source Software is a System and Network Monitoring tool developed by Worldwide Nagios Community in the year 1999. It comes with a wide range of features used to Monitor Servers and System Health, Networking devices like Switches, Router, Applications, and so on. It’s a Cross-Platform application available for all kinds of Operating Systems (Linux, Microsoft Windows, Vmware ESX).
Nagios Core capable to Provide the below features :
- Nagios Core can be used to Monitor Server Health, Networking Devices like Switches, Routers..etc, Services, Applications..etc.
- Gives alerts of Servers and Applications Outage.
- Nagios Core is capable of send alerts of any critical issues through different mediums like SMS, Emails.
- Can be download Historical Reports of Network Issues and Outages and so many other things.
- Supports Network Protocols like HTTP, FTP, POP3, SSH, etc.
- Provides Log Files Support for each and every operation.
Not only this much, but there are also so many other features you will able to get from Nagios Core.
My Nagios Core Server Details :
IP Address : 192.168.0.103
Follow the below steps to Install Nagios Core On Redhat/Centos/Fedora :
We need to install some packages and dependencies before Nagios Core Installation. So Follow the below steps to do so.
Before the Installation of Nagios Core, we have to install LAMP Stack. to do so refer to the below command. Here I used httpd* and PHP* so that all packages related httpd and PHP will install which is needed by Nagios core.
[root@localhost ~]# yum -y install httpd* php* mysql mysql-server # Installing LAMP Stack
Now start the apache service.
[root@localhost ~]# /etc/init.d/httpd start   # Starting Apache Service
Starting httpd:                                            [  OK  ]
Start the httpd service on Startup.
[root@localhost ~]# chkconfig --level 35 httpd on # Start httpd service on Startup
To confirm apache service started you can access the default home page of apache by URL : http://localhost

Nagios Core required some more Packages and Dependencies. To install so refer to the below command.
[root@localhost ~]# yum -y install gd gd-devel gcc glibc glibc-common net-snmp
Now we have to download the latest version of Nagios Core Package and Its required Plugins.
- nagios-4.3.2.tar.gz
- nagios-plugins-2.2.1.tar.gz
To do so create a directory named Nagios. refer to the below command.
[root@localhost ~]# mkdir nagios   # Create a Directory
[root@localhost ~]# cd nagios/   # Changing Directory
Now follow the below commands to download both Packages.
- Downloading nagios-4.3.2.tar.gz.
[root@localhost nagios]# http://downloads.sourceforge.net/project/nagios/nagios-4.x/nagios-4.3.2/nagios-4.3.2.tar.gz
bash: http://downloads.sourceforge.net/project/nagios/nagios-4.x/nagios-4.3.2/nagios-4.3.2.tar.gz: No such file or directory
[root@localhost nagios]# wget http://downloads.sourceforge.net/project/nagios/nagios-4.x/nagios-4.3.2/nagios-4.3.2.tar.gz
--2017-05-21 03:25:17--  http://downloads.sourceforge.net/project/nagios/nagios-4.x/nagios-4.3.2/nagios-4.3.2.tar.gz
Resolving downloads.sourceforge.net... 216.34.181.59
Connecting to downloads.sourceforge.net|216.34.181.59|:80... connected.
HTTP request sent, awaiting response... 302 Found
Location: https://excellmedia.dl.sourceforge.net/project/nagios/nagios-4.x/nagios-4.3.2/nagios-4.3.2.tar.gz [following]
--2017-05-21 03:25:17--  https://excellmedia.dl.sourceforge.net/project/nagios/nagios-4.x/nagios-4.3.2/nagios-4.3.2.tar.gz
Resolving excellmedia.dl.sourceforge.net... 202.153.32.19
Connecting to excellmedia.dl.sourceforge.net|202.153.32.19|:443... connected.
HTTP request sent, awaiting response... 200 OK
Length: 11096863 (11M) [application/x-gzip]
Saving to: “nagios-4.3.2.tar.gz”

100%[=========================================================================================>] 11,096,863   681K/s   in 14s

2017-05-21 03:25:32 (752 KB/s) - “nagios-4.3.2.tar.gz” saved [11096863/11096863]
- Downloading nagios-plugins-2.2.1.tar.gz
[root@localhost nagios]# wget http://nagios-plugins.org/download/nagios-plugins-2.2.1.tar.gz
--2017-05-21 03:27:04--  http://nagios-plugins.org/download/nagios-plugins-2.2.1.tar.gz
Resolving nagios-plugins.org... 72.14.186.43
Connecting to nagios-plugins.org|72.14.186.43|:80... connected.
HTTP request sent, awaiting response... 200 OK
Length: 2728818 (2.6M) [application/x-gzip]
Saving to: “nagios-plugins-2.2.1.tar.gz”

100%[=========================================================================================>] 2,728,818   3.86M/s   in 0.7s

2017-05-21 03:27:05 (3.86 MB/s) - “nagios-plugins-2.2.1.tar.gz” saved [2728818/2728818]
As you can see below we have successfully downloaded both packages.
[root@localhost nagios]# ls -l
total 13508
-rw-r--r--. 1 root root 11096863 May  9 10:16 nagios-4.3.2.tar.gz
-rw-r--r--. 1 root root  2728818 Apr 19 09:04 nagios-plugins-2.2.1.tar.gz
Now follow the below steps to Configured Nagios Core 4.3. First, we have to create a User named “nagios“. and then set Password for that.
[root@localhost ~]# useradd nagios   # Creating a User
[root@localhost ~]# passwd nagios   # Set Password for the User
Changing password for user nagios.
New password:
Retype new password:
passwd: all authentication tokens updated successfully.
Now create a Group named “nagcmd“.
[root@localhost ~]# groupadd nagcmd
Now we have to add two users to nagcmd Group i.e. nagios and apache.
[root@localhost ~]# usermod -a -G nagcmd nagios
[root@localhost ~]# usermod -a -G nagcmd apache
You can confirm the same by using the below command.
[root@localhost ~]# id nagios
uid=501(nagios) gid=501(nagios) groups=501(nagios),502(nagcmd)
[root@localhost ~]# id apache
uid=48(apache) gid=48(apache) groups=48(apache),502(nagcmd)
After completing the necessary steps let’s go ahead and extract the downloaded Packages i.e. Nagios Core 4.3 and it’s Plugin.
- Extracting Nagios Core Package.
[root@localhost nagios]# tar -xzvf nagios-4.3.2.tar.gz # Extracting Nagios Core
2. Extracting Nagios Plugin Package.
[root@localhost nagios]# tar -xzvf nagios-plugins-2.2.1.tar.gz # Extracting Nagios Plugin
After extract the packages you will get two directories. Highlighted below.
[root@localhost nagios]# ls -l
total 13516
drwxrwxr-x. 18 root root     4096 May  9 10:03 nagios-4.3.2
-rw-r--r--.  1 root root 11096863 May  9 10:16 nagios-4.3.2.tar.gz
drwxr-xr-x. 15 root root     4096 Apr 19 09:04 nagios-plugins-2.2.1
-rw-r--r--.  1 root root  2728818 Apr 19 09:04 nagios-plugins-2.2.1.tar.gz
Let’s first Install the Nagios Core Package. To do so refer to the below steps.
[root@localhost nagios]# cd nagios-4.3.2  # Changing the directory
[root@localhost nagios-4.3.2]# ls
base          config.sub      docs       indent-all.sh  lib           module            README.asciidoc  test            worker
cgi           configure       doxy.conf  indent.sh      LICENSE       nagios.spec       sample-config    THANKS          xdata
Changelog     configure.ac    functions  INSTALLING     Makefile.in   nagios.sysconfig  subst.in         t-tap
common        contrib         html       install-sh     make-tarball  pkginfo.in        t                update-version
config.guess  daemon-init.in  include    LEGAL          mkpackage     README            tap              UPGRADING
Then run configure script to compile the Package.
[root@localhost nagios-4.3.2]# ./configure # Executing configure Script
After complete, the above process run make all command.
[root@localhost nagios-4.3.2]# make all
& then use make install command to install the Nagios Core Package.
[root@localhost nagios-4.3.2]# make install
After installation completed you will able to see the below message at the end of the installation which is asking us to install three scripts i.e. init, commandmode, and config. Highlighted below.
*** Main program, CGIs and HTML files installed ***

You can continue with installing Nagios as follows (type 'make'
without any arguments for a list of all possible options):

  make install-init
     - This installs the init script in /etc/rc.d/init.d

  make install-commandmode
     - This installs and configures permissions on the
       directory for holding the external command file

  make install-config
     - This installs sample config files in /usr/local/nagios/etc

make[1]: Leaving directory `/root/nagios/nagios-4.3.2'
So follow the below steps to Install all three Scripts.
- Installing init Script.
[root@localhost nagios-4.3.2]# make install-init   # Install init Script
/usr/bin/install -c -m 755 -d -o root -g root /etc/rc.d/init.d
/usr/bin/install -c -m 755 -o root -g root daemon-init /etc/rc.d/init.d/nagios

*** Init script installed ***
- Installing Command Mode Script
[root@localhost nagios-4.3.2]# make install-commandmode   # Installing CommandMode Script
/usr/bin/install -c -m 775 -o nagios -g nagios -d /usr/local/nagios/var/rw
chmod g+s /usr/local/nagios/var/rw

*** External command directory configured ***
- Installing config Script.
[root@localhost nagios-4.3.2]# make install-config   # Installing Config Script
/usr/bin/install -c -m 775 -o nagios -g nagios -d /usr/local/nagios/etc
/usr/bin/install -c -m 775 -o nagios -g nagios -d /usr/local/nagios/etc/objects
/usr/bin/install -c -b -m 664 -o nagios -g nagios sample-config/nagios.cfg /usr/local/nagios/etc/nagios.cfg
/usr/bin/install -c -b -m 664 -o nagios -g nagios sample-config/cgi.cfg /usr/local/nagios/etc/cgi.cfg
/usr/bin/install -c -b -m 660 -o nagios -g nagios sample-config/resource.cfg /usr/local/nagios/etc/resource.cfg
/usr/bin/install -c -b -m 664 -o nagios -g nagios sample-config/template-object/templates.cfg /usr/local/nagios/etc/objects/templates.cfg
/usr/bin/install -c -b -m 664 -o nagios -g nagios sample-config/template-object/commands.cfg /usr/local/nagios/etc/objects/commands.cfg
/usr/bin/install -c -b -m 664 -o nagios -g nagios sample-config/template-object/contacts.cfg /usr/local/nagios/etc/objects/contacts.cfg
/usr/bin/install -c -b -m 664 -o nagios -g nagios sample-config/template-object/timeperiods.cfg /usr/local/nagios/etc/objects/timeperiods.cfg
/usr/bin/install -c -b -m 664 -o nagios -g nagios sample-config/template-object/localhost.cfg /usr/local/nagios/etc/objects/localhost.cfg
/usr/bin/install -c -b -m 664 -o nagios -g nagios sample-config/template-object/windows.cfg /usr/local/nagios/etc/objects/windows.cfg
/usr/bin/install -c -b -m 664 -o nagios -g nagios sample-config/template-object/printer.cfg /usr/local/nagios/etc/objects/printer.cfg
/usr/bin/install -c -b -m 664 -o nagios -g nagios sample-config/template-object/switch.cfg /usr/local/nagios/etc/objects/switch.cfg

*** Config files installed ***

Remember, these are *SAMPLE* config files.  You'll need to read
the documentation for more information on how to actually define
services, hosts, etc. to fit your particular needs.
Now Install Nagios and Apache Web Configuration Files.
[root@localhost nagios-4.3.2]# make install-webconf   # Installing Webconf Script
/usr/bin/install -c -m 644 sample-config/httpd.conf /etc/httpd/conf.d/nagios.conf
if [ 0 -eq 1 ]; then \
                ln -s /etc/httpd/conf.d/nagios.conf /etc/apache2/sites-enabled/nagios.conf; \
        fi

*** Nagios/Apache conf file installed ***
Also Read – How to Configure Basic Authentication in Apache Web Server
Now we are done with Nagios Core 4.3 Installation. Normally Nagios doesn’t have their own Authentication System So we have to configure Apache Authentication using htpasswd command. Refer to the command below.
[root@localhost ~]# htpasswd -c /usr/local/nagios/etc/htpasswd.users nagiosadmin
New password:
Re-type new password:
Adding password for user nagiosadmin
Here nagiosadmin is the name of the user for authentication.
Then restart the apache Package to refresh the Installation.
[root@localhost ~]# /etc/init.d/httpd restart
Stopping httpd:                                            [  OK  ]
Then start the Nagios Core Service.
[root@localhost ~]# /etc/init.d/nagios start
Starting nagios: done.
Configure the Nagios core Service to start at startup.
[root@localhost ~]# chkconfig --level 35 nagios on
Now you can bypass the Apache Port i.e. 80 from Iptables or stop the IPtable Service. Here I am going to stop the Iptable Service.
[root@localhost ~]# /etc/init.d/iptables stop
iptables: Setting chains to policy ACCEPT: filter          [  OK  ]
iptables: Flushing firewall rules:                         [  OK  ]
iptables: Unloading modules:                               [  OK  ]
We need SELinux in Permissive Mode so to do so you can refer the below command.
[root@localhost ~]# setenforce 0 # Set SELinux in Permissive Mode
Confirm the SELinux Status you can use the below command.
[root@localhost ~]# getenforce
Permissive
We have successfully installed the Nagios Core 4.3 Package. But there is some bugs in Nagios Core hence we have installed the given Plugin’s which we have downloaded from the Official Website of Nagios Core.
So to Install the Nagios Core Plugin follow the below command.
[root@localhost nagios]# cd nagios-plugins-2.2.1   # Change the Directory
[root@localhost nagios-plugins-2.2.1]# ls
ABOUT-NLS         ChangeLog     configure.ac  lib                  nagios-plugins.spec.in  plugins          REQUIREMENTS
acinclude.m4      CODING        COPYING       m4                   NEWS                    plugins-root     SUPPORT
ACKNOWLEDGEMENTS  config.h.in   FAQ           Makefile.am          NPTest.pm               plugins-scripts  tap
aclocal.m4        config.rpath  gl            Makefile.in          NP-VERSION-GEN          po               test.pl.in
AUTHORS           config_test   INSTALL       mkinstalldirs        perlmods                README           THANKS
build-aux         configure     LEGAL         nagios-plugins.spec  pkg                     release          tools
Compile the Nagios Core Plugin Package and Install it using the below commands.
[root@localhost nagios-plugins-2.2.1]# ./configure   # Compile the Package
[root@localhost nagios-plugins-2.2.1]# make   # Make the Packages ready for Installation
[root@localhost nagios-plugins-2.2.1]# make install   # Install the Package
Once everything is done restart the Apache and Nagios Core Services.
[root@localhost ~]# /etc/init.d/httpd restart
Stopping httpd:                                            [  OK  ]
Starting httpd:                                            [  OK  ]
[root@localhost ~]# /etc/init.d/nagios restart
Running configuration check...
Stopping nagios: done.
Starting nagios: done.
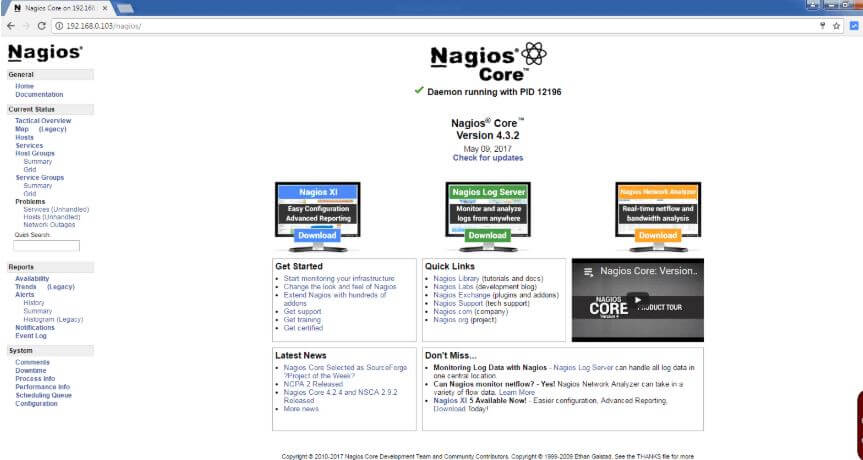
Now go to your Internet Browser and enter the below URL.
http://IP_ADDRESS_OF_SYSTEM/Nagios
eg: Here my Nagios Server IP Address is 192.168.0.103 so the URL would be http://192.168.0.103/nagios

Here just enter the Username i.e. nagiosadmin that we have created for apache authentication and its password.

OR you can access the same by localhost also.
http://localhost/nagios

That’s it! In this article, we have explained How to Install Nagios Core On Redhat/Centos/Fedora. I hope you enjoy this article. If you like this article, then just share it. If you have any questions about this article, please comment.