In this article, we will learn How to install Digikam Digital Photo Management Software in Ubuntu 18.04. Digikam is an open source photo management software for Linux that works primarily as an image organizer and viewer. It is a multiplatform application available for the main operating systems, that is, Linux, Microsoft Windows, MacOS. Digikam was developed using the C++ programming language and was released under the GNU GPLv2 license.
- You can export images from the Digikam photo management software to several popular websites related to images and social media sites such as Flickr, Facebook, etc.
- There are so many add-ons available for the Digikam application for more features.
- Very good editing images
- Record images on CD/DVD.
- It supports various image formats, ie PNG, GIF, JPEG, etc.
- You can import images from electronic devices such as hard drives, flash drives, digital cameras, etc.
- Create print designs using Digikam digital photo management software.
- Export photo albums by mail.
Follow the below steps to install Digikam digital photo management software in Ubuntu 18.04:
Before we start installing Digikam digital photo management software, we have to install an official repository of that since Digikam is not part of the default repository of Ubuntu 18.04. Then, to install the PPA repository, follow the following command.
mangesh@itsmarttricks:~$ sudo add-apt-repository ppa:philip5/extra
[sudo] password for mangesh:
Ubuntu experimental rolling release repository.

Mainly assorted media apps and other programs that I use myself or by requests.
More info: https://launchpad.net/~philip5/+archive/ubuntu/extra
Press [ENTER] to continue or Ctrl-c to cancel adding it.
^[[6~
Ign:1 http://dl.google.com/linux/chrome/deb stable InRelease
Ign:2 http://ppa.launchpad.net/philip5/extra/ubuntu bionic InRelease
Get:3 http://in.archive.ubuntu.com/ubuntu bionic InRelease [242 kB]
Get:4 http://security.ubuntu.com/ubuntu bionic-security InRelease [88.7 kB]
Err:5 http://ppa.launchpad.net/philip5/extra/ubuntu bionic Release
404 Not Found [IP: 91.189.95.83 80]
Get:6 http://dl.google.com/linux/chrome/deb stable Release [943 B]
Get:7 http://dl.google.com/linux/chrome/deb stable Release.gpg [819 B]
Get:8 http://in.archive.ubuntu.com/ubuntu bionic-updates InRelease [88.7 kB]
Get:9 http://security.ubuntu.com/ubuntu bionic-security/main amd64 Packages [380 kB]
Get:10 http://dl.google.com/linux/chrome/deb stable/main amd64 Packages [1,094 B]
After installing the official PPA repository, update the packages and repositories of Ubuntu 18.04 with the following command.
mangesh@itsmarttricks:~$ sudo apt-get update
Ign:1 http://dl.google.com/linux/chrome/deb stable InRelease
Ign:2 http://ppa.launchpad.net/philip5/extra/ubuntu bionic InRelease
Hit:3 http://security.ubuntu.com/ubuntu bionic-security InRelease
Hit:4 http://in.archive.ubuntu.com/ubuntu bionic InRelease
Hit:5 http://dl.google.com/linux/chrome/deb stable Release
Err:6 http://ppa.launchpad.net/philip5/extra/ubuntu bionic Release
404 Not Found [IP: 91.189.95.83 80]
Hit:7 http://in.archive.ubuntu.com/ubuntu bionic-updates InRelease
Hit:9 http://in.archive.ubuntu.com/ubuntu bionic-backports InRelease
Reading package lists... Done
We are now ready to install Digikam software package. So let’s go ahead and install them using the command below.
mangesh@itsmarttricks:~$ sudo apt-get install digikam
Reading package lists... Done
Building dependency tree
Reading state information... Done
The following additional packages will be installed:
catdoc cpp-7 digikam-data digikam-private-libs ffmpegthumbs gcc-7-base
Need to get 253 MB of archives.
After this operation, 746 MB of additional disk space will be used.
Do you want to continue? [Y/n] y
Get:1 http://in.archive.ubuntu.com/ubuntu bionic-updates/main amd64 libgomp1 amd64 8.3.0-6ubuntu1~18.04 [76.4 kB]
Get:2 http://in.archive.ubuntu.com/ubuntu bionic-updates/main amd64 gcc-8-base amd64 8.3.0-6ubuntu1~18.04 [18.6 kB]
Get:3 http://in.archive.ubuntu.com/ubuntu bionic-updates/main amd64 libstdc++6 amd64 8.3.0-6ubuntu1~18.04 [400 kB]
Get:4 http://in.archive.ubuntu.com/ubuntu bionic-updates/main amd64 libcc1-0 amd64 8.3.0-6ubuntu1~18.04 [47.4 kB]
Get:5 http://in.archive.ubuntu.com/ubuntu bionic-updates/main amd64 libgcc1 amd64 1:8.3.0-6ubuntu1~18.04 [40.7 kB]
Get:6 http://in.archive.ubuntu.com/ubuntu bionic/main amd64 libdouble-conversion1 amd64 2.0.1-4ubuntu1 [33.0 kB]
Get:7 http://in.archive.ubuntu.com/ubuntu bionic-updates/main amd64 libqt5core5a amd64 5.9.5+dfsg-0ubuntu2.1 [2,037 kB]
Get:8 http://in.archive.ubuntu.com/ubuntu bionic/universe amd64 libqt5script5 amd64 5.9.5+dfsg-0ubuntu1 [729 kB]
Get:9 http://in.archive.ubuntu.com/ubuntu bionic-updates/main amd64 libqt5dbus5 amd64 5.9.5+dfsg-0ubuntu2.1 [196 kB]
Get:10 http://in.archive.ubuntu.com/ubuntu bionic-updates/main amd64 libqt5network5 amd64 5.9.5+dfsg-0ubuntu2.1 [635 kB]
As you can see above, we have successfully installed the Digikam digital photo management software package. To confirm the same, see the command below.
mangesh@itsmarttricks:~$ sudo dpkg -l digikam
Desired=Unknown/Install/Remove/Purge/Hold
| Status=Not/Inst/Conf-files/Unpacked/halF-conf/Half-inst/trig-aWait/Trig-pend
|/ Err?=(none)/Reinst-required (Status,Err: uppercase=bad)
||/ Name Version Architecture Description
+++-==============-============-============-=================================
ii digikam 4:5.6.0-0ubu amd64 digital photo management applicat
Also Read – How to install Krita Digital Painting in Ubuntu 18.04 – Free Art Software For Linux
Now to open the application just type the digikam command on the shell. See the command below.
mangesh@itsmarttricks:~$ digikam
Once you open the app for the first time, the screen below appears and you need to do some settings for the Digikam app. Here just click Next.
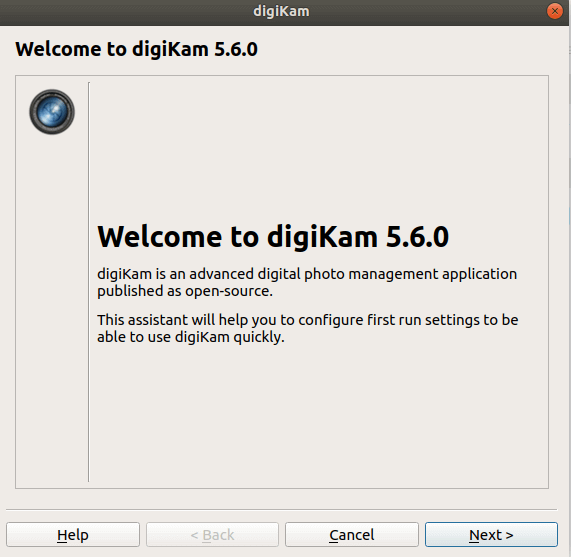
Now set the installation path for the application and click Next. See the snapshot below.

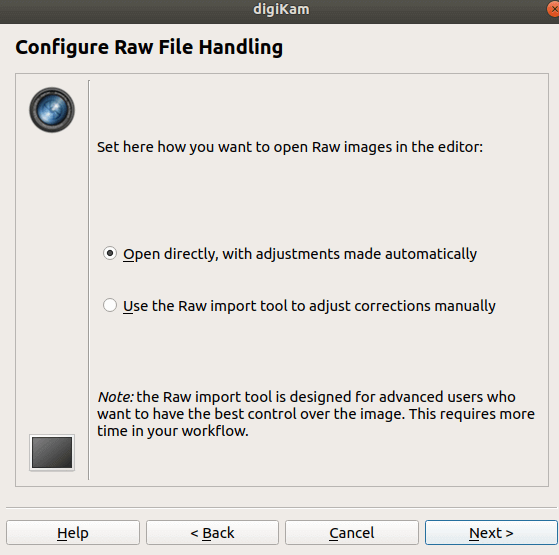
Here you must configure the RAW file processing settings. I’ll go with the default settings and click Next.
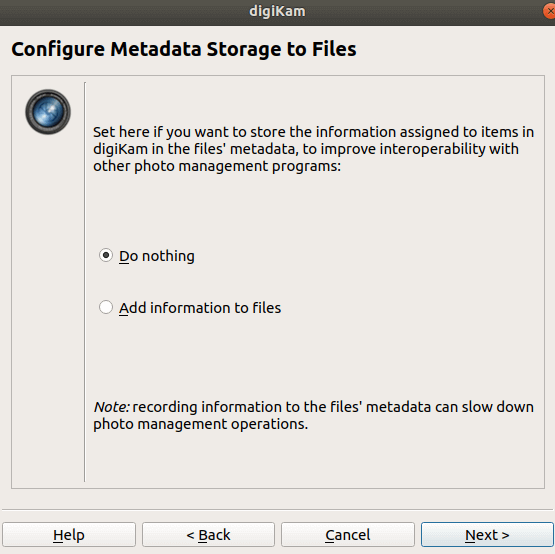
Now, keep the default metadata storage settings, and then click Next.
Configure open file behavior and click on Next.
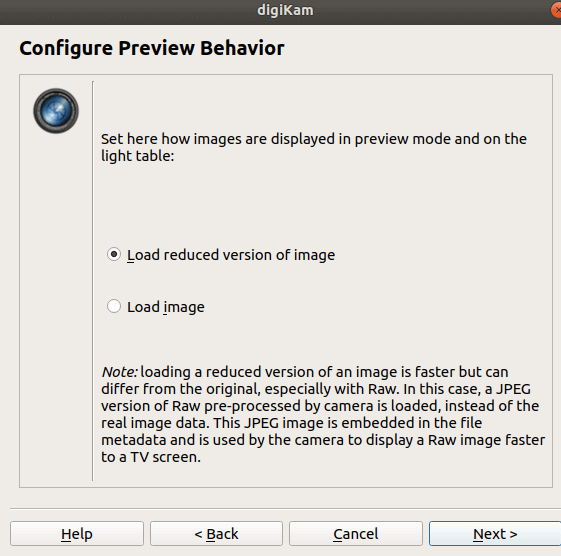
Configure digikam preview behavior then click on Next.
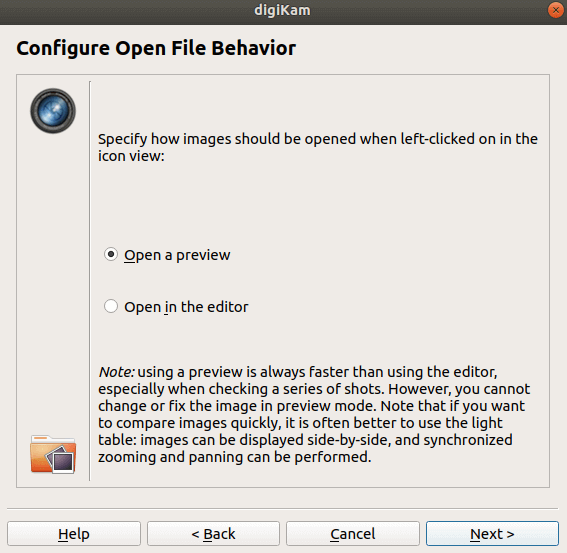
Contextual Tooltips settings. Click on Next.

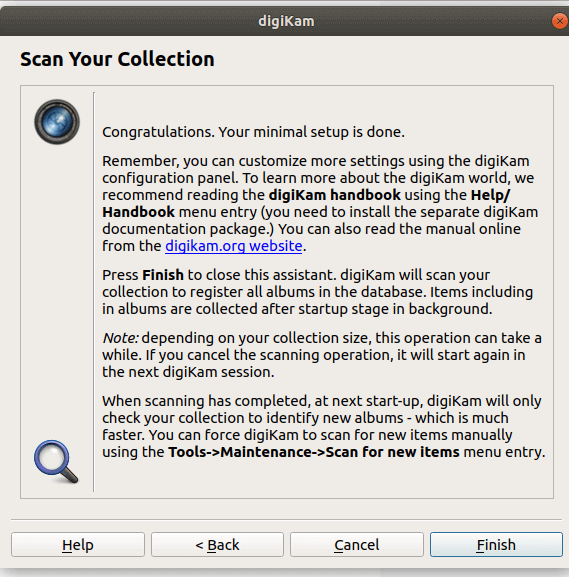
Click on Finish to complete the configuration.
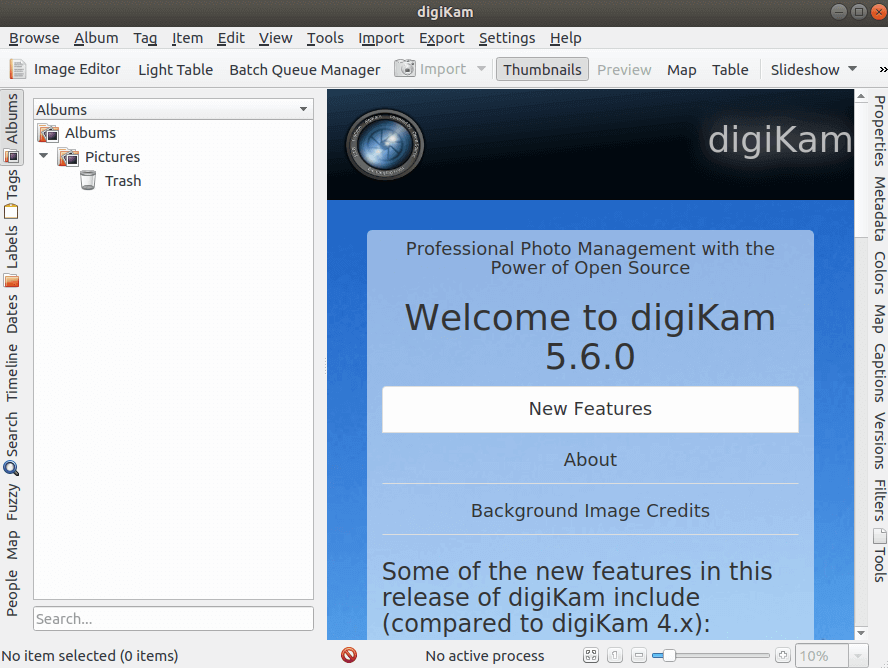
Now you can see the Digikam digital photo management software.
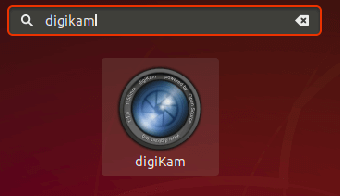
You can also open Digikam to manage digital images in a graphical way using the search box on your computer. See the snapshot below.
Also Read – How to install Fotoxx Linux Photo Editor and Collection Manager in Ubuntu 18.04
How To Uninstall Digikam Digital Photo Management Software in Ubuntu 18.04?
For any reasons, if you don’t like Digikam Digital Photo Management Software and want to uninstall the application from your system using the following command.
mangesh@itsmarttricks:~$ sudo dpkg -r digikam
[sudo] password for mangesh:
(Reading database ... 123890 files and directories currently installed.)
Removing digikam (4:5.6.0-0ubuntu10) ...
Processing triggers for man-db (2.8.3-2) ...
Processing triggers for gnome-menus (3.13.3-11ubuntu1) ...
Processing triggers for desktop-file-utils (0.23-1ubuntu3.18.04.1) ...
Processing triggers for mime-support (3.60ubuntu1) ...
That’s all, In this article, we have explained How to install Digikam Digital Photo Management Software in Ubuntu 18.04. I hope you enjoy this article. If you like this article, then just share it. If you have any questions about this article, please comment.
