In this article, we are going to learn how to create a swap partition using the command fdisk, Before that let me explain to you what is the use of swap partition in Linux. SWAP Partition is also known as SWAP memory, It acts as a Virtual Memory in Linux. When the physical memory of the system is full then Swap memory helps to the system with a small amount of memory but we can’t consider it as a replacement of more memory.
Follow the steps to Create a Swap Partition in Linux:
Step: 1 Create a Partition
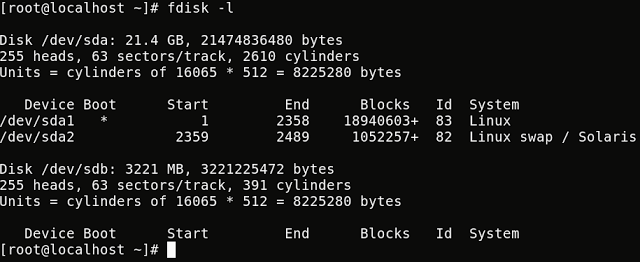
First, check the available free disks to create a new partition by the below command.
# fdisk -l # To list the available free disks and created partitions.
Create a partition by the below command.
# fdisk /dev/sdb # To Create a new partition
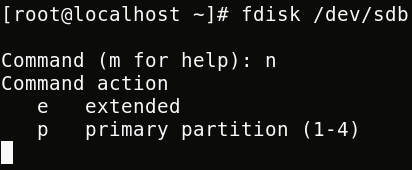
Here you can enter “n” to create a new Partition or enter “m” to go for help, We are going to create a new partition so enter “n“.
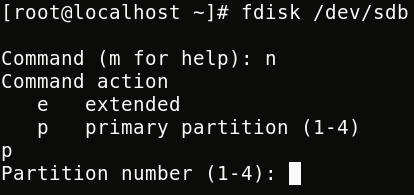
Now we have two options i.e. Primary Partition by entering “p” or Extended Partition by entering “e“, So now we can select “p” and go for a Primary Partition.
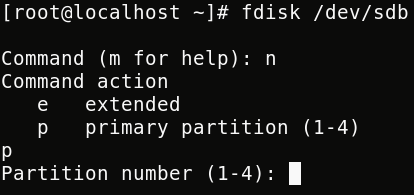
Here enter the available partition number for that disk and Press Enter.
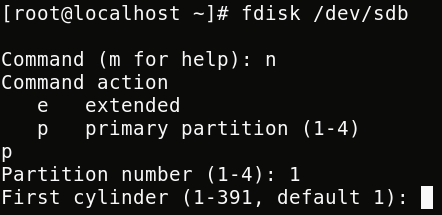
Now it’s asking for Cylinder, You can just press Enter to take the system default Cylinder.
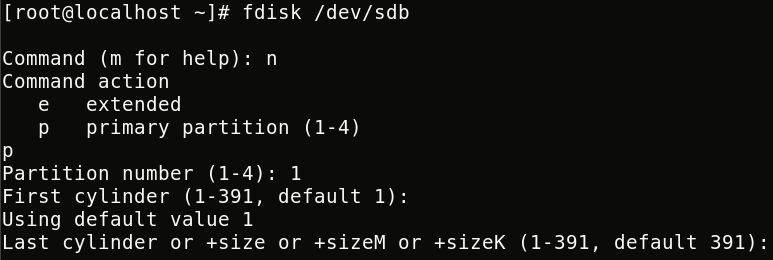
As we can see System took its default Cylinder value as 1, now its time to give the Partition Size.
Here we can enter the partition size in two ways in GB’s or in MB’s, For Example, If you want to give the partition size as 1 GB then you can Enter +1G or +1024M.
So Let’s go with +1G and Press Enter.
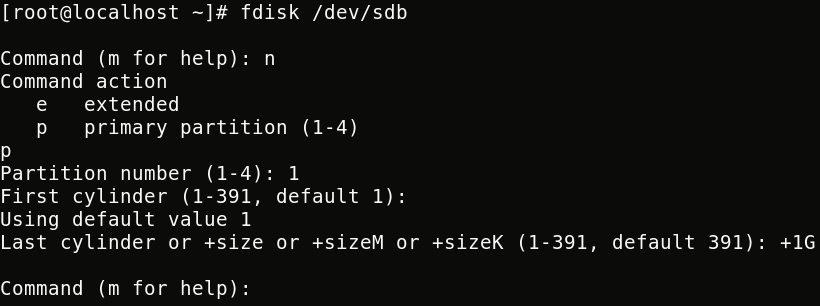
So we create the partition successfully but our goal is to create an additional swap partition, for that we need to change the partition ID for that we have to enter “t” or for help, we can go for “m“.

As we can see in the help file “t” is for change the partition’s system ID, So let’s go for “t“.

Now we have to enter the Partition code for the swap partition, for we can enter “L” to check the same.
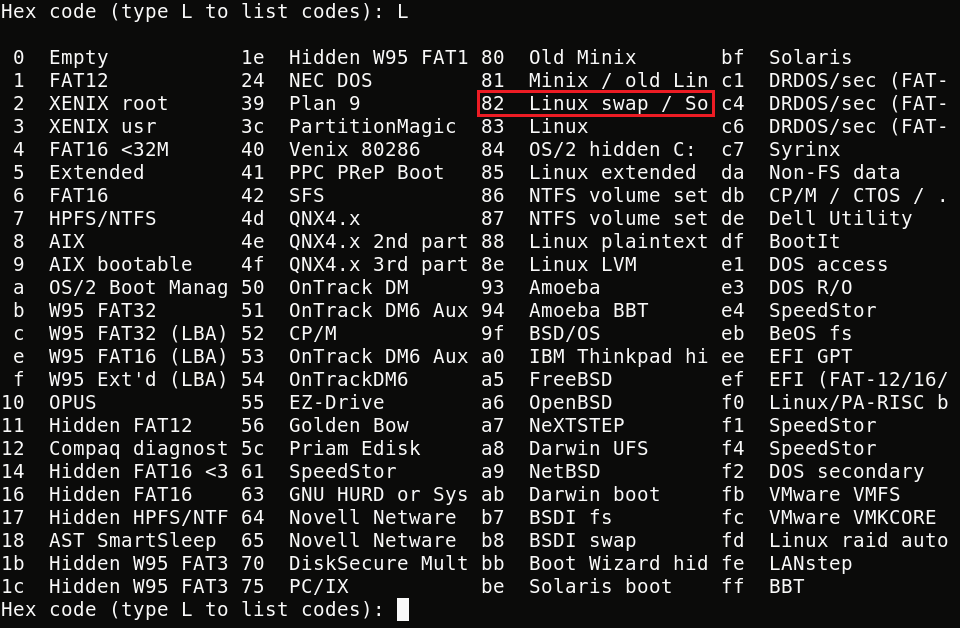
As we can see on the Partition code List “82” is the code of Linux swap.

Now enter “w” to commit changes and save the partition table.

In Linux based system after creating a partition, we suppose to restart the system to take effect but we can skip that by running “partprobe command”
# partprobe /dev/sdb # Changes take effect without restat the system
Also Read – How To Mount NTFS File System In Redhat/Centos
Step: 2 Create Swap Signature
Now Let’s create the swap Signature with “mkswap” command.
# mkswap /dev/sdb1 -L newswap # To make a swap partition

L – To Label your Partition for Identification, This can be left as an optional but Highly recommended.
we can use “blkid” command to check the Labels given to File Systems.

Now enable the swapping and publish the swap space to the kernel by below command.
# swapon /dev/sdb2 # Enable swapping on /dev/sdb2
OR we can use swapon -a to activate all swap partitions (Multiple swap Partitions)
Step: 3 Mount the Swap Partition
Now It’s time to add the newly created swap partition on “/etc/fstab” file to start the partition at startup.
# vi /etc/fstab # Edit the "fstab" file

We can check the swap status with the below command.
# swapon -s
“swapon -s” shows swap usage summary by device, Equivalent to “cat /proc/swaps”

As we can see on the above snapshot we have two swap partitions, out of which highlighted one is recently created and currently it’s usage status is 0.
We have another command to check the status of the swap memory is “free -m”
$ free -m # Display amount of free and used memory in the system
That’s all, In this article, we have explained How to Create a Swap Partition in Linux. I hope you enjoy this article. If you like this article, then just share it. If you have any questions about this article, please comment.

