
In this article we are going to learn ‘How To Configure Raid 5 (Software Raid) In Linux Using Mdadm’. RAID 5 means (redundant array of independent disk). Redundancy means a backup is available to replace the person who has failed if something goes wrong. RAID was first discovered in 1987. The main purpose of RAID 5 is to secure and prevent data loss, increase read speed, and increase overall system performance. RAID is a technology that uses techniques like mirroring, parity checking, stripping to secure data. There are many levels for Red, and each level features some new features. If there are RAID levels, then the following types are: RAID 0, RAID 1, RAID 2, RAID 3, RAID 4, RAID 5, RAID 6, RAID 10 (RAID Level 1 + RAID Level 0), but the most commonly used and famous RAID layers are:
- RAID 0 – Striping the Data
- RAID 1 – Mirroring the Data
- RAID 5 – striping with parity check
- RAID 6 – striping with double parity check
- RAID 10 – Uses both mirroring and striping
 In Linux Using Mdadm")
Here in this article we will discuss how to configure Red5 (software RAID) in RHEL/CentOS 7.
How the RAID 5 Works ?
 In Linux Using Mdadm")
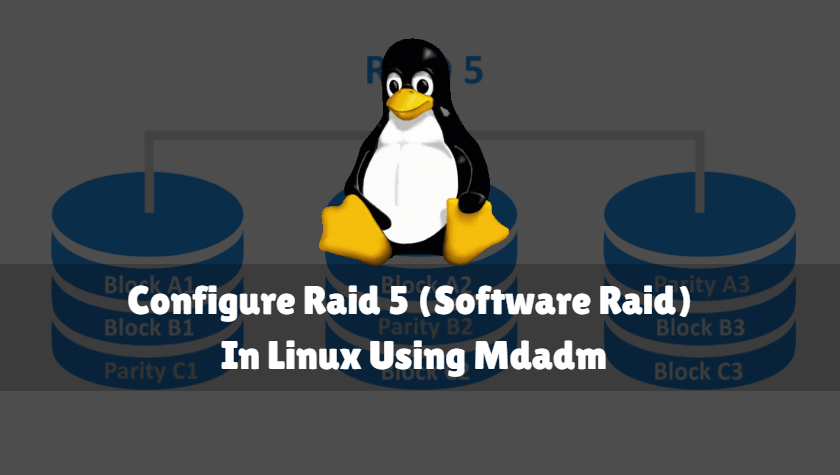
First let’s understand how RAID5 works. We know that RAID 5 uses stripping and parity detection techniques to secure data. Take a look at the snapshot above showing the actual diagram of RAID 5. We need at least three hard disks to configure RAID 5. When we copy data to a hard disk, it stores it in binary format (binary numbers: 0 and 1). So let’s take this for example we have some data in the form binary 1010 1110 0110 as shown in the snapshot above. So when copying data into harddisk it is distributed to all three harddisk, suppose 1010 is copied to harddisk 1, 1110 is copied to harddisk 2 and copy to harddisk 3 as copied to 0110. Distribution of data from multiple hard disks is called data stripping. After copying the data, RAID 5 creates a parity bit on each hard disk. RAID 5 uses the XOR table to calculate the parity bit. Find the XOR (Unique OR) table below:
XOR (Exclusive OR) Table :
| A | B | Output |
| 0 | 0 | 0 |
| 0 | 1 | 1 |
| 1 | 0 | 1 |
| 1 | 1 | 0 |
So let’s look at the part of how RAID 5 calculates for a Parity bit.
RAID 5 takes two harddisks at a time and calculates parity bits for example first creating paritys for harddiscs 1 and 2, then for harddisk 2 and 3 and finally harddisk 1 and 3, we have three hard disks according to the scenario above, the first of which is a hard disk. And let’s take an example of Hard disk 2.
Note: RAID 5 stores parity data on all harddisk For example when creating parity for harddisk 1 and 2, it is preferred on both harddisk, as in harddisk 1 and harddisk 2 and the process is the same as harddisk 2 and 3 and harddisk 1 and 3.
Harddisk 1 & Harddisk 2 contains :
| Harddisk 1 | Harddisk 2 |
| 1 | 1 |
| 0 | 1 |
| 1 | 1 |
| 0 | 0 |
Steps to Calculate the Parity :
Here I used XOR table to calculate the Parity Check
Example :
First Bit of harddisk 1 is 1 and First bit of Harddisk 2 is 1 so as per XOR table A=1 B=1 Output=0
Our First Parity Bit is=0

Second Bit of Harddisk 1 is 0 and Second Bit of Harddisk 2 is 1 so as per XOR table A=0 B=1 Output=1
Our Second Parity Bit is=1

Third Bit of Harddisk 1 is 1 and Third Bit of Harddisk 2 is 1 so as per XOR table A=0 B=1 Output=0
Our Third Parity Bit is=0

Fourth Bit of Harddisk 1 is 0 and Fourth Bit of Harddisk 2 is 0 so as per XOR table A=0 B=1 Output=0
Our Fourth Parity Bit is=0
| Harddisk 1 | Harddisk 2 | Parity Check |
| 1 | 1 | 0 |
| 0 | 1 | 1 |
| 1 | 1 | 0 |
| 0 | 0 | 0 |
So parity Data for Harddisk 1 & 2 is 0 1 0 0. After create the parity data it stores it on both Harddisk 1 & 2 to recover the data after Harddisk Failure.
RAID 5 uses the above steps to create parity bit for Harddisk 2 & Harddisk 3, and then Harddisk 1 & Harddisk 3
Let’s take an Example that our First Harddisk i.e. Harddisk 1 got faulty and we replaced a New Harddisk in place of that, In that case RAID 5 uses what calculation to Recover the Data to Newly replaced Harddisk. Here below I explained the calculation :
So as Harddisk 1 got faulty currently we have Data in Harddisk 2 which cannot be recovered by own, In that case RAID 5 check Parity data to recover the data of Harddisk 1. Shown the calculation below :
So Harddisk 2 and Parity Contains below data :
| Harddisk 2 | Parity Check |
| 1 | 0 |
| 1 | 1 |
| 1 | 0 |
| 0 | 0 |
First Bit of harddisk 2 is 1 and First bit of Parity is 0 so as per XOR table A=1 B=0 Output=1
Our First Parity Bit is=1

Second Bit of Harddisk 2 is 1 and Second Bit of Parity is 1 so as per XOR table A=1 B=1 Output=0
Our Second Parity Bit is=0

Third Bit of Harddisk 2 is 1 and Third Bit of Parity is 0 so as per XOR table A=1 B=0 Output=1
Our Third Parity Bit is=1

Fourth Bit of Harddisk 2 is 0 and Fourth Bit of Parity is 0 so as per XOR table A=0 B=0 Output=0
Our Fourth Parity Bit is=0
So after match the Harddisk 2 Data with Parity Data we got a result that is 1 0 1 0 which is matching with our Harddisk 1 Data. So this is how RAID 5 recover the data after replacing a new harddisk and follows the same steps to recover data if Harddisk 2 or harddisk 3 got faulty.
Also Read – How to Increase Existing Software Raid 5 Storage Capacity In Linux
Follow the below steps to Configure RAID 5 (Software RAID) in Linux using mdadm
As we discussed earlier to configure RAID 5 we need altleast three harddisks of same size Here i have three Harddisks of same size i.e. 3GB each. Refer the output below.
[root@localhost ~]# fdisk -l
Disk /dev/sdb: 3221 MB, 3221225472 bytes, 6291456 sectors
Units = sectors of 1 * 512 = 512 bytes
Sector size (logical/physical): 512 bytes / 512 bytes
I/O size (minimum/optimal): 512 bytes / 512 bytes


Disk /dev/sdc: 3221 MB, 3221225472 bytes, 6291456 sectors    # Harddisk No. 1
Units = sectors of 1 * 512 = 512 bytes
Sector size (logical/physical): 512 bytes / 512 bytes
I/O size (minimum/optimal): 512 bytes / 512 bytes


Disk /dev/sdd: 3221 MB, 3221225472 bytes, 6291456 sectors    # Harddisk No. 2
Units = sectors of 1 * 512 = 512 bytes
Sector size (logical/physical): 512 bytes / 512 bytes
I/O size (minimum/optimal): 512 bytes / 512 bytes


Disk /dev/sde: 3221 MB, 3221225472 bytes, 6291456 sectors    # Harddisk No. 3
Units = sectors of 1 * 512 = 512 bytes
Sector size (logical/physical): 512 bytes / 512 bytes
I/O size (minimum/optimal): 512 bytes / 512 bytes


Disk /dev/sda: 21.5 GB, 21474836480 bytes, 41943040 sectors
Units = sectors of 1 * 512 = 512 bytes
Sector size (logical/physical): 512 bytes / 512 bytes
I/O size (minimum/optimal): 512 bytes / 512 bytes
Disk label type: dos
Disk identifier: 0x000c0d0d

   Device Boot      Start         End      Blocks   Id  System
/dev/sda1   *        2048     2099199     1048576   83  Linux
/dev/sda2         2099200    41943039    19921920   8e  Linux LVM

Disk /dev/mapper/cl-root: 18.2 GB, 18249416704 bytes, 35643392 sectors
Units = sectors of 1 * 512 = 512 bytes
Sector size (logical/physical): 512 bytes / 512 bytes
I/O size (minimum/optimal): 512 bytes / 512 bytes


Disk /dev/mapper/cl-swap: 2147 MB, 2147483648 bytes, 4194304 sectors
Units = sectors of 1 * 512 = 512 bytes
Sector size (logical/physical): 512 bytes / 512 bytes
I/O size (minimum/optimal): 512 bytes / 512 bytes
Now we have to create partitions on each Harddisk and need to change it’s partition id for RAID 5 i.e. fd Follow the below steps to do the same.
Note : You can create three partitions to configure RAID 5 or can use three harddisks to configure it. Here I am using three Harddisks.
- Creating Partition in /dev/sdb
[root@localhost ~]# fdisk /dev/sdb
Welcome to fdisk (util-linux 2.23.2).

Changes will remain in memory only, until you decide to write them.
Be careful before using the write command.

Device does not contain a recognized partition table
Building a new DOS disklabel with disk identifier 0xf463adc9.

Command (m for help): n
Partition type:
   p   primary (0 primary, 0 extended, 4 free)
   e   extended
Select (default p): p
Partition number (1-4, default 1): 1
First sector (2048-6291455, default 2048):
Using default value 2048
Last sector, +sectors or +size{K,M,G} (2048-6291455, default 6291455):
Using default value 6291455
Partition 1 of type Linux and of size 3 GiB is set

Command (m for help): t     # To change the Partition ID
Selected partition 1
Hex code (type L to list all codes): fd     # "fd" is the Partition ID of RAID
Changed type of partition 'Linux' to 'Linux raid autodetect'

Command (m for help): w     # To save the Partition
The partition table has been altered!

Calling ioctl() to re-read partition table.
Syncing disks.- Creating Partition in /dev/sdc
[root@localhost ~]# fdisk /dev/sdc
Welcome to fdisk (util-linux 2.23.2).

Changes will remain in memory only, until you decide to write them.
Be careful before using the write command.

Device does not contain a recognized partition table
Building a new DOS disklabel with disk identifier 0xd591a214.

Command (m for help): n
Partition type:
   p   primary (0 primary, 0 extended, 4 free)
   e   extended
Select (default p): p
Partition number (1-4, default 1): 1
First sector (2048-6291455, default 2048):
Using default value 2048
Last sector, +sectors or +size{K,M,G} (2048-6291455, default 6291455):
Using default value 6291455
Partition 1 of type Linux and of size 3 GiB is set

Command (m for help): t
Selected partition 1
Hex code (type L to list all codes): fd
Changed type of partition 'Linux' to 'Linux raid autodetect'

Command (m for help): w
The partition table has been altered!

Calling ioctl() to re-read partition table.
Syncing disks.- Creating Partition in /dev/sdd
[root@localhost ~]# fdisk /dev/sdd
Welcome to fdisk (util-linux 2.23.2).

Changes will remain in memory only, until you decide to write them.
Be careful before using the write command.

Device does not contain a recognized partition table
Building a new DOS disklabel with disk identifier 0x1374f2ae.

Command (m for help): n
Partition type:
   p   primary (0 primary, 0 extended, 4 free)
   e   extended
Select (default p): p
Partition number (1-4, default 1): 1
First sector (2048-6291455, default 2048):
Using default value 2048
Last sector, +sectors or +size{K,M,G} (2048-6291455, default 6291455):
Using default value 6291455
Partition 1 of type Linux and of size 3 GiB is set

Command (m for help): t
Selected partition 1
Hex code (type L to list all codes): fd
Changed type of partition 'Linux' to 'Linux raid autodetect'

Command (m for help): w
The partition table has been altered!

Calling ioctl() to re-read partition table.
Syncing disks.
Now save the Partition table without restarting the system by using partprobe command. Refer the commands below.
[root@localhost ~]# partprobe /dev/sdb
[root@localhost ~]# partprobe /dev/sdc
[root@localhost ~]# partprobe /dev/sdd
Now let’s have a look at partition table after create RAID partitions.
[root@localhost ~]# fdisk -l

Disk /dev/sdb: 3221 MB, 3221225472 bytes, 6291456 sectors
Units = sectors of 1 * 512 = 512 bytes
Sector size (logical/physical): 512 bytes / 512 bytes
I/O size (minimum/optimal): 512 bytes / 512 bytes
Disk label type: dos
Disk identifier: 0xf463adc9

   Device Boot      Start         End      Blocks   Id  System
/dev/sdb1            2048     6291455     3144704   fd  Linux raid autodetect  # Harddisk No. 1 with RAID ID

Disk /dev/sdc: 3221 MB, 3221225472 bytes, 6291456 sectors
Units = sectors of 1 * 512 = 512 bytes
Sector size (logical/physical): 512 bytes / 512 bytes
I/O size (minimum/optimal): 512 bytes / 512 bytes
Disk label type: dos
Disk identifier: 0xd591a214

   Device Boot      Start         End      Blocks   Id  System
/dev/sdc1            2048     6291455     3144704   fd  Linux raid autodetect  # Harddisk No. 2 with RAID ID

Disk /dev/sdd: 3221 MB, 3221225472 bytes, 6291456 sectors
Units = sectors of 1 * 512 = 512 bytes
Sector size (logical/physical): 512 bytes / 512 bytes
I/O size (minimum/optimal): 512 bytes / 512 bytes
Disk label type: dos
Disk identifier: 0x1374f2ae

   Device Boot      Start         End      Blocks   Id  System
/dev/sdd1            2048     6291455     3144704   fd  Linux raid autodetect  # Harddisk No. 3 with RAID ID

Disk /dev/sde: 3221 MB, 3221225472 bytes, 6291456 sectors
Units = sectors of 1 * 512 = 512 bytes
Sector size (logical/physical): 512 bytes / 512 bytes
I/O size (minimum/optimal): 512 bytes / 512 bytes


Disk /dev/sda: 21.5 GB, 21474836480 bytes, 41943040 sectors
Units = sectors of 1 * 512 = 512 bytes
Sector size (logical/physical): 512 bytes / 512 bytes
I/O size (minimum/optimal): 512 bytes / 512 bytes
Disk label type: dos
Disk identifier: 0x000c0d0d

   Device Boot      Start         End      Blocks   Id  System
/dev/sda1   *        2048     2099199     1048576   83  Linux
/dev/sda2         2099200    41943039    19921920   8e  Linux LVM

Disk /dev/mapper/cl-root: 18.2 GB, 18249416704 bytes, 35643392 sectors
Units = sectors of 1 * 512 = 512 bytes
Sector size (logical/physical): 512 bytes / 512 bytes
I/O size (minimum/optimal): 512 bytes / 512 bytes


Disk /dev/mapper/cl-swap: 2147 MB, 2147483648 bytes, 4194304 sectors
Units = sectors of 1 * 512 = 512 bytes
Sector size (logical/physical): 512 bytes / 512 bytes
I/O size (minimum/optimal): 512 bytes / 512 bytes
So we have done with our required partition creation for RAID, now let’s go ahead and configure RAID 5 (Software RAID).
To configure RAID 5 we need a package to be installed i.e. mdadm. By default it’s already been installed with Operating System Installation but if it’s not there then you can install it by using below command.
yum -y install mdadm
Now use the below command to create and start RAID 5 Arrey.
[root@localhost ~]# mdadm -C /dev/md0 --level=raid5 --raid-devices=3 /dev/sdb1 /dev/sdc1 /dev/sdd1
mdadm: Defaulting to version 1.2 metadata
mdadm: array /dev/md0 started.
Where :
- mdadm – Command to create RAID Arrey
- -C – to Create RAID
- /dev/md0 – RAID Drive Syntax
- –level – To mention the RAID Level, Here It’s RAID 5
- –raid-devices – To mention the Number of Harddisks to be used, Here I am using 3 Harddisks
To check the details of created RAID 5 Partition use the below command.
[root@localhost ~]# mdadm --detail /dev/md0
/dev/md0:
        Version : 1.2
  Creation Time : Thu Feb  2 22:45:10 2017
     Raid Level : raid5
     Array Size : 6285312 (5.99 GiB 6.44 GB)
  Used Dev Size : 3142656 (3.00 GiB 3.22 GB)
   Raid Devices : 3
  Total Devices : 3
    Persistence : Superblock is persistent

    Update Time : Thu Feb  2 22:45:27 2017
          State : clean
 Active Devices : 3
Working Devices : 3
 Failed Devices : 0
  Spare Devices : 0

         Layout : left-symmetric
     Chunk Size : 512K

           Name : localhost.localdomain:0  (local to host localhost.localdomain)
           UUID : 58646119:b28d0d72:495483bb:b675fabd
         Events : 18

    Number   Major   Minor   RaidDevice State
       0       8       17        0      active sync   /dev/sdb1
       1       8       33        1      active sync   /dev/sdc1
       3       8       49        2      active sync   /dev/sdd1
Now after create the RAID 5 partition as usual we need to create file system by format it, so format the RAID 5 drive using below command.
Note : Here I am formatting the RAID 5 drive using ext4 File system, You can use different file system as per your requirement.
[root@localhost ~]# mkfs.ext4 /dev/md0    # Format the RAID 5 Partition with ext4 Filesystem
mke2fs 1.42.9 (28-Dec-2013)
Filesystem label=
OS type: Linux
Block size=4096 (log=2)
Fragment size=4096 (log=2)
Stride=128 blocks, Stripe width=256 blocks
393216 inodes, 1571328 blocks
78566 blocks (5.00%) reserved for the super user
First data block=0
Maximum filesystem blocks=1610612736
48 block groups
32768 blocks per group, 32768 fragments per group
8192 inodes per group
Superblock backups stored on blocks:
        32768, 98304, 163840, 229376, 294912, 819200, 884736

Allocating group tables: done
Writing inode tables: done
Creating journal (32768 blocks): done
Writing superblocks and filesystem accounting information: done
Now create a directory to mount the RAID drive. We can mount the drive in two ways 1) Temporary mounting 2) Permanent Mounting.
- Temporary mounting means it will unmount automatically after restart the system and will not mount after boot the system. Follow the below steps for Temporary Mounting.
[root@localhost ~]# mkdir /data   # Create a Directory to mount RAID 5 Partition
[root@localhost ~]#
[root@localhost ~]# mount /dev/md0 /data/   # Mounting RAID 5 Partition
[root@localhost ~]#
[root@localhost ~]# ls -l /data/
total 16
drwx------. 2 root root 16384 Feb  2 22:52 lost+found
Use the below command to check mounted devices.
[root@localhost ~]# df -h   # Check Mounted Devices
Filesystem           Size  Used Avail Use% Mounted on
/dev/mapper/cl-root   17G  3.3G   14G  20% /
devtmpfs             473M     0  473M   0% /dev
tmpfs                489M  144K  489M   1% /dev/shm
tmpfs                489M  7.1M  482M   2% /run
tmpfs                489M     0  489M   0% /sys/fs/cgroup
/dev/sda1           1014M  173M  842M  18% /boot
tmpfs                 98M   12K   98M   1% /run/user/0
/dev/sr0             4.1G  4.1G     0 100% /run/media/root/CentOS 7 x86_64
/dev/md0             5.8G   24M  5.5G   1% /data
2. In permanent mounting the partition will be in mounted state even after restart the system for that we need to enter the partition and file system details on /etc/fstab configuration file.
[root@localhost ~]# nano /etc/fstab
#
# /etc/fstab
# Created by anaconda on Thu Feb  2 06:45:19 2017
#
# Accessible filesystems, by reference, are maintained under '/dev/disk'
# See man pages fstab(5), findfs(8), mount(8) and/or blkid(8) for more info
#
/dev/mapper/cl-root     /                       xfs     defaults        0 0
UUID=bc684813-20e7-46bd-b384-3c632cfc76d2 /boot                   xfs     defaults    $
/dev/mapper/cl-swap     swap                    swap    defaults        0 0

/dev/md0        /data   ext4    defaults        0 0
Use the below command to Refresh the mounting table.
[root@localhost ~]# mount -a
After mount the RAID 5 drive in /etc/fstab just confirm if mounted properly or not by using df -h command.
[root@localhost ~]# df -h | grep /dev/md0
/dev/md0             5.8G   24M  5.5G   1% /data
Now Let’s have a look at some troubleshooting Part.
There is some instances comes when suppose one harddisk got faulty out of three. Then what you will do to recover the data.Don’t worry there is ways available to recover the data and that is the reason why RAID Technology is so famous and due to its Redundancy feature All Organisations in all over the world uses this.
Now I will show you how to Recover the data after a Harddisk got failed, Follow the below steps.
Let’s first create scenario and Use the below command to make faulty any one of hardisk let’s say /dev/sdd1 for Experimental purpose.
[root@localhost ~]# mdadm /dev/md0 -f /dev/sdd1   # To make the Harddisk Faulty
mdadm: set /dev/sdd1 faulty in /dev/md0
Where :
f – To make Harddik Faulty
To check the faulty harddisk status use the below command.
As we can see below /dev/sdd1 is showing faulty.
[root@localhost ~]# mdadm --detail /dev/md0
/dev/md0:
        Version : 1.2
  Creation Time : Thu Feb  2 22:45:10 2017
     Raid Level : raid5
     Array Size : 6285312 (5.99 GiB 6.44 GB)
  Used Dev Size : 3142656 (3.00 GiB 3.22 GB)
   Raid Devices : 3
  Total Devices : 3
    Persistence : Superblock is persistent

    Update Time : Fri Feb  3 17:30:04 2017
          State : clean, degraded
 Active Devices : 2
Working Devices : 2
 Failed Devices : 1
  Spare Devices : 0

         Layout : left-symmetric
     Chunk Size : 512K

           Name : localhost.localdomain:0  (local to host localhost.localdomain)
           UUID : 58646119:b28d0d72:495483bb:b675fabd
         Events : 20

    Number   Major   Minor   RaidDevice State
       0       8       17        0      active sync   /dev/sdb1
       1       8       33        1      active sync   /dev/sdc1
       -       0        0        2      removed

       3       8       49        -      faulty   /dev/sdd1
So our next step is to Remove the Harddisk from the system, for that run the below command.
[root@localhost ~]# mdadm /dev/md0 -r /dev/sdd1   # To Remove the Faulty Harddisk
mdadm: hot removed /dev/sdd1 from /dev/md0
Where :
r – To Remove the Harddisk
As shown on the output below faulty harddisk has been removed from the system, Now we have to add a new harddisk as a replacement of Faulty one.
[root@localhost ~]# mdadm --detail /dev/md0
/dev/md0:
        Version : 1.2
  Creation Time : Thu Feb  2 22:45:10 2017
     Raid Level : raid5
     Array Size : 6285312 (5.99 GiB 6.44 GB)
  Used Dev Size : 3142656 (3.00 GiB 3.22 GB)
   Raid Devices : 3
  Total Devices : 2
    Persistence : Superblock is persistent

    Update Time : Fri Feb  3 17:33:23 2017
          State : clean, degraded
 Active Devices : 2
Working Devices : 2
 Failed Devices : 0
  Spare Devices : 0

         Layout : left-symmetric
     Chunk Size : 512K

           Name : localhost.localdomain:0  (local to host localhost.localdomain)
           UUID : 58646119:b28d0d72:495483bb:b675fabd
         Events : 43

    Number   Major   Minor   RaidDevice State
       0       8       17        0      active sync   /dev/sdb1
       1       8       33        1      active sync   /dev/sdc1
       -       0        0        2      removed
So I have connected a new Harddisk i.e. /dev/sde, So prepare the Harddisk for RAID, Follow the below steps.
[root@localhost ~]# fdisk /dev/sde
Welcome to fdisk (util-linux 2.23.2).

Changes will remain in memory only, until you decide to write them.
Be careful before using the write command.


Command (m for help): n
Partition type:
   p   primary (0 primary, 0 extended, 4 free)
   e   extended
Select (default p): p
Partition number (1-4, default 1): 1
First sector (2048-6291455, default 2048):
Using default value 2048
Last sector, +sectors or +size{K,M,G} (2048-6291455, default 6291455):
Using default value 6291455
Partition 1 of type Linux and of size 3 GiB is set

Command (m for help): t
Selected partition 1
Hex code (type L to list all codes): fd
Changed type of partition 'Linux' to 'Linux raid autodetect'

Command (m for help): w
The partition table has been altered!

Calling ioctl() to re-read partition table.
Syncing disks.
Now add the harddisk /dev/sde1 in our RAID 5 drive i.e. /dev/md0.
[root@localhost ~]# mdadm /dev/md0 -a /dev/sde1   # To Add new Harddisk to RAID Drive
mdadm: added /dev/sde1
Where :
a – To add a New Harddisk
Check the status by using below command.
As we can see below /dev/sde1 has been added to our RAID Drive.
[root@localhost ~]# mdadm --detail /dev/md0
/dev/md0:
        Version : 1.2
  Creation Time : Thu Feb  2 22:45:10 2017
     Raid Level : raid5
     Array Size : 6285312 (5.99 GiB 6.44 GB)
  Used Dev Size : 3142656 (3.00 GiB 3.22 GB)
   Raid Devices : 3
  Total Devices : 3
    Persistence : Superblock is persistent

    Update Time : Fri Feb  3 17:35:11 2017
          State : clean
 Active Devices : 3
Working Devices : 3
 Failed Devices : 0
  Spare Devices : 0

         Layout : left-symmetric
     Chunk Size : 512K

           Name : localhost.localdomain:0  (local to host localhost.localdomain)
           UUID : 58646119:b28d0d72:495483bb:b675fabd
         Events : 62

    Number   Major   Minor   RaidDevice State
       0       8       17        0      active sync   /dev/sdb1
       1       8       33        1      active sync   /dev/sdc1
       3       8       65        2      active sync   /dev/sde1
Also Read – How to Configure Software RAID 1 (Disk Mirroring) Using Mdadm in Linux
That’s all, In this article, we have explained the How To Configure Raid 5 (Software Raid) In Linux Using Mdadm. I hope you enjoy this article. If you like this article, then just share it. If you have any questions about this article, please comment.
can Linux mdadm be used to create a Raid 50 ?
(One or more Raid5 arrays, MIRRORED across each other).