In this article, we are going to learn how to configure static IP address in the Microsoft Windows operating system. In this chapter, I will explain to you both the Static and Dynamic IP address. First, what is a dynamic IP address? When a client system gets the IP address automatically from the DHCP server that is called a dynamic IP address. A static IP address is completely opposite of that. When we configure the IP address manually for any client system then that is called a Static IP address configuration. Here in this article, I will show you how to do that. So let’s get started.
Follow the below steps for Step By Step Configure Static IP Address In Microsoft Windows:
You have to follow simple 5 steps to configure the same.
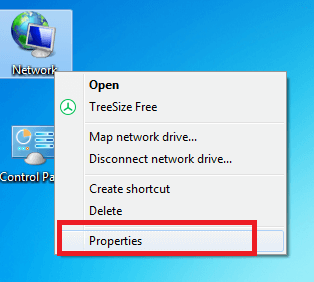
Right-click on the Network icon (Available on desktop) and click on Properties.
Now you will get the Network and Sharing Center window. Here on the left side top portion, you will get an option called Change adapter settings. Just click there.

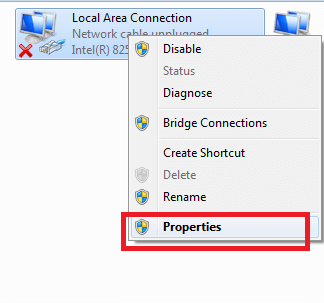
After the above step, you will get all the list of LAN connections that are connected to your system. Here just right click on the Local Area Connection where you want to configure static IP address and click on Properties.
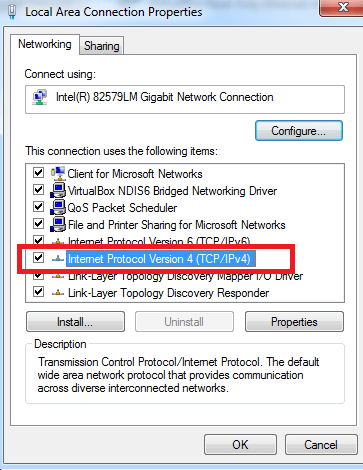
On the next window, you will get an option called Internet Protocol version 4 (IPv4). Just select the option and click on the Properties button. Refer to the snapshot below.
Also Read – What is IP Address (Internet Protocol Address)
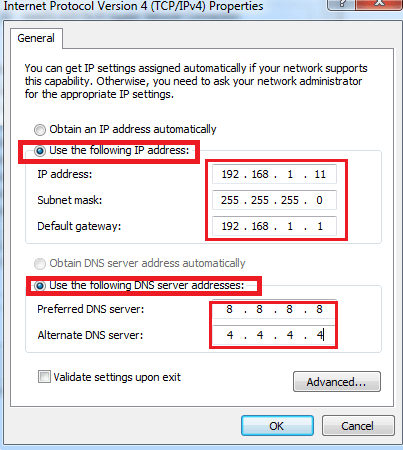
After the above step, you will get a new window. Here enable the Use the following IP address option and enter IP Address, Subnet Mask, Default Gateway on the respective field.
For DNS client configuration enable the Use the following DNS server addresses option and enter DNS Server IP addresses on Preferred DNS Server and Alternate DNS Server field. Refer to the snapshot below.
Now to check the above configuration just open the command prompt and type the below command :
ipconfig

That’s all, In this article, we have explained Step By Step configure Static Ip Address In Microsoft Windows. I hope you enjoy this article. If you like this article, then just share it. If you have any questions about this article, please comment.
