In this article, we will learn How to install Oracle Java 8 on Ubuntu Linux. Java is a programming language such as other programming languages such as C ++, C, Python, etc. For the first time, Java was invented by James Gosling in 1991, and Sun Microsystems produced it for the first time in 1995. The first version of Java was Java 1.0. Today, Real World is a major place in Java, and in almost every place you can find websites, electronic devices (eg TV, mobile, etc.), applications/software, and much more like this.
Follow the below steps to install Oracle Java 8 on Ubuntu Linux:
Before installing Oracle Java 8, we will need to install the required PPA repositories. To do so follow the command below.
itsmarttricks@mangesh:~$ sudo add-apt-repository ppa:webupd8team/java
[sudo] password for itsmarttricks:
Oracle Java (JDK) Installer (automatically downloads and installs Oracle JDK8). There are no actual Java files in this PPA.

Important -> Why Oracle Java 7 And 6 Installers No Longer Work: http://www.webupd8.org/2017/06/why-oracle-java-7-and-6-installers-no.html

Update: Oracle Java 9 has reached end of life: http://www.oracle.com/technetwork/java/javase/downloads/jdk9-downloads-3848520.html

The PPA supports Ubuntu 18.10, 18.04, 16.04, 14.04 and 12.04.

More info (and Ubuntu installation instructions):
- http://www.webupd8.org/2012/09/install-oracle-java-8-in-ubuntu-via-ppa.html

Debian installation instructions:
- Oracle Java 8: http://www.webupd8.org/2014/03/how-to-install-oracle-java-8-in-debian.html

For Oracle Java 11, see a different PPA -> https://www.linuxuprising.com/2018/10/how-to-install-oracle-java-11-in-ubuntu.html
More info: https://launchpad.net/~webupd8team/+archive/ubuntu/java
Press [ENTER] to continue or Ctrl-c to cancel adding it.

Ign:1 cdrom://Ubuntu 18.04.1 LTS _Bionic Beaver_ - Release amd64 (20180725) bionic InRelease
Err:2 cdrom://Ubuntu 18.04.1 LTS _Bionic Beaver_ - Release amd64 (20180725) bionic Release
After installing the PPA repository for Oracle Java 8, update the packages and repositories using the following command.
itsmarttricks@mangesh:~$ sudo apt-get update
Ign:1 cdrom://Ubuntu 18.04.1 LTS _Bionic Beaver_ - Release amd64 (20180725) bionic InRelease
Err:2 cdrom://Ubuntu 18.04.1 LTS _Bionic Beaver_ - Release amd64 (20180725) bionic Release
Please use apt-cdrom to make this CD-ROM recognized by APT. apt-get update cannot be used to add new CD-ROMs
Ign:3 http://dl.google.com/linux/chrome/deb stable InRelease
Hit:4 http://packages.microsoft.com/repos/vscode stable InRelease
Hit:5 http://ppa.launchpad.net/alessandro-strada/ppa/ubuntu bionic InRelease
Now we are ready to install the Oracle Java 8 package. So let’s go ahead and install the same using the below command.
itsmarttricks@mangesh:~$ sudo apt-get install oracle-java8-installer
Reading package lists... Done
Building dependency tree
Reading state information... Done
oracle-java8-installer is already the newest version (8u201-1~webupd8~1).
The following packages were automatically installed and are no longer required:
java-wrappers linux-image-unsigned-4.15.0-34-generic
linux-image-unsigned-4.15.0-45-generic linux-modules-4.15.0-34-generic
Use 'sudo apt autoremove' to remove them.
0 upgraded, 0 newly installed, 0 to remove and 119 not upgraded.
After Installation set Java 8 as a default Oracle Java Version using the below command.
itsmarttricks@mangesh:~$ sudo apt-get install oracle-java8-set-default
[sudo] password for itsmarttricks:
Reading package lists... Done
Building dependency tree
Reading state information... Done
The following packages were automatically installed and are no longer required:
java-wrappers linux-image-unsigned-4.15.0-34-generic
linux-image-unsigned-4.15.0-45-generic linux-modules-4.15.0-34-generic
Use 'sudo apt autoremove' to remove them.
The following NEW packages will be installed:
oracle-java8-set-default
0 upgraded, 1 newly installed, 0 to remove and 119 not upgraded.
Need to get 6,984 B of archives.
After this operation, 20.5 kB of additional disk space will be used.
Get:1 http://ppa.launchpad.net/webupd8team/java/ubuntu bionic/main amd64 oracle-java8-set-default all 8u201-1~webupd8~1 [6,984 B]
Fetched 6,984 B in 1s (14.0 kB/s)
Selecting previously unselected package oracle-java8-set-default.
(Reading database ... 195737 files and directories currently installed.)
Preparing to unpack .../oracle-java8-set-default_8u201-1~webupd8~1_all.deb ...
Unpacking oracle-java8-set-default (8u201-1~webupd8~1) ...
Setting up oracle-java8-set-default (8u201-1~webupd8~1) ...
After Installation to confirm the java version using the below commands.
itsmarttricks@mangesh:~$ java -version
java version "1.8.0_201"
Java(TM) SE Runtime Environment (build 1.8.0_201-b09)
Java HotSpot(TM) 64-Bit Server VM (build 25.201-b09, mixed mode)
itsmarttricks@mangesh:~$ javac -version
javac 1.8.0_201
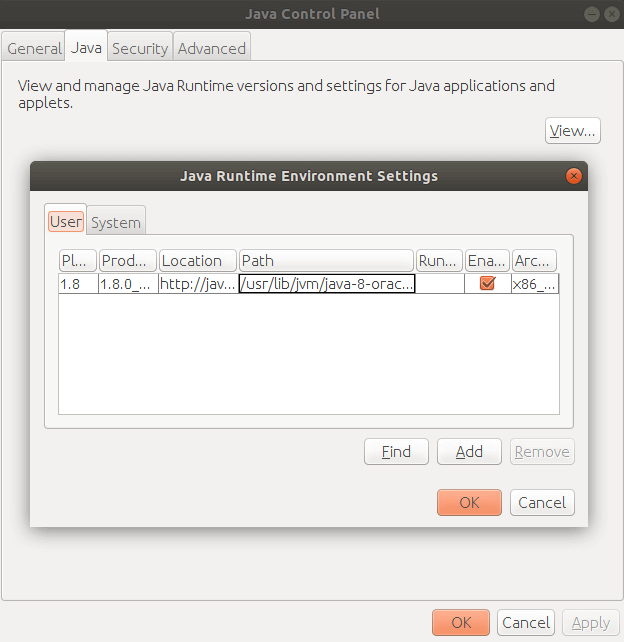
You can also open and check the java application graphically using Search your Ubuntu Applications box. Refer to the snapshot below.
Check the java application version graphically.
Also Read – How to install jEdit Text Editor Application in Ubuntu Linux
How To Uninstall Oracle Java 8 Application in Ubuntu Linux?
To Uninstall Oracle Java 8 Application from your system using the following command.
itsmarttricks@mangesh:~$ sudo apt-get purge oracle-java8-installer
Reading package lists... Done
Building dependency tree
Reading state information... Done
The following packages were automatically installed and are no longer required:
java-wrappers linux-image-unsigned-4.15.0-34-generic
linux-image-unsigned-4.15.0-45-generic linux-modules-4.15.0-34-generic
Use 'sudo apt autoremove' to remove them.
The following packages will be REMOVED:
oracle-java8-installer* oracle-java8-set-default*
0 upgraded, 0 newly installed, 2 to remove and 119 not upgraded.
After this operation, 138 kB disk space will be freed.
Do you want to continue? [Y/n] y
(Reading database ... 195741 files and directories currently installed.)
Removing oracle-java8-set-default (8u201-1~webupd8~1) ...
Removing oracle-java8-installer (8u201-1~webupd8~1) ...
update-alternatives: removing manually selected alternative - switching appletviewer to auto mode
That’s all, In this article, we have explained How to install Oracle Java 8 on Ubuntu Linux. I hope you enjoy this article. If you like this article, then just share it. If you have any questions about this article, please comment.

“Package oracle-java8-installer is not available, but is referred to by another package.”
This seems to be out of date now